
Throne and Liberty Paladin Tank Build – Sword Shield Wand Tome
Welcome to our Throne & Liberty Paladin Tank build. This is a supportive build that uses a combination of the Sword & Shield and Wand & Tome weapons to taunt and debuff enemies while helping out allies. While this build can be adjusted to push some decent AoE damage, it is not a DPS build and you should choose another build if that’s what you’re looking for. But if you want a Throne & Liberty build that can control the battle by weakening and stunning enemies while buffing and healing allies, the Paladin Build is a great option.
For a full overview of all builds please visit the Throne and Liberty Builds Database.
Since creating and fully optimising a Throne & Liberty build is a long and complex process, this guide will not only explain how to create the build and how it works, but also has early and midgame setups and suggestions about which aspects of the build to prioritize farming, crafting or upgrading.
Mainhand: Sword & Shield
Offhand: Wand & Tome
Table of Contents:
- How to build your Character [Important]
- Leveling Character
- Leveling Skills and Gear
- Paladin Basics
- Skill Setups
- Attribute Stat Priority
- Gear Progression
- Guardians
- Buff Food & Potions
How to Build your Paladin Tank Character in Throne and Liberty
Playing Throne and Liberty can be overwhelming at first. In this section, I want to explain quickly how your character build progression works in this game. Leveling up to max level is easy and won’t take long, just follow the main story purple quests and you will hit max level at the end of the story. During this period the game teaches you how to craft gear, this will allow you to get full green gear fairly fast while also working on some basic blue items.
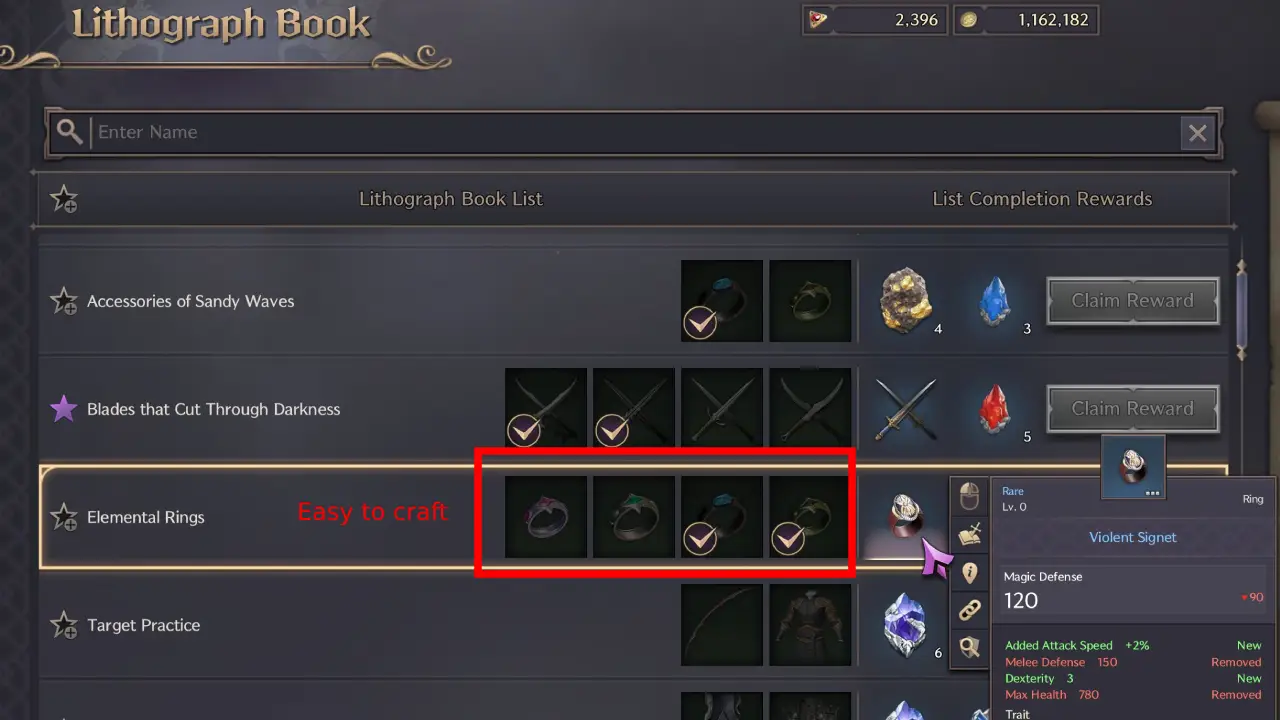
Now you are at max level, you can get some easy wins with the Lithograph Book (Check Menu in-game). This allows you to sacrifice certain items and in return you get better items. So you can get slightly better blue gear.
Important: Now, this is where most players make a big mistake. They want to start going from blue to purple gear. But this is too early! The main strength of gear comes from attribute stats (buffs to Strength, Dexterity, etc) and traits. Fully traiting a purple item is impossible as a new player unless you swipe your credit card. Therefore, you want to first get good blue gear with good attribute stats and good traits before you even consider going after purple gear.
It is best to either bank purple items you drop or sell them at the Auction House if they are worth a lot. You don’t sell items in this game, you sell the extract of it with the trait. Traits are the most important aspect of this game and is where most of your time commitment will be.

You always want to level up your blue gear too. You won’t lose any materials on this, because you can transfer the level and trait power of a blue item into a Purple item. So a level 9 blue item transferred into a purple will result in a level 6 purple item. The blue traits will disappear but the purple item gets “trait blessing”. This makes it cheaper to get your purple item traited.
Once you have good blue gear, then you can think about starting to equip purple items! Finding a purple item isn’t necessarily difficult, but fully traiting and maxing it out definitely is!
- Leveling up is easy, follow purple main story quest to hit max level.
- While leveling, you get green items and a few blue items.
- After max level, focus on getting good blue gear.
- Don’t focus on purple items yet! (Rookie Mistake)
- Focus on getting good blue items to max level and fully traiting them
- After that, you can think about starting to equip purple items.
- Max level blue gear with full traits is better than non-maxed purple gear with no traits.
- Do your dailies, co-op dungeons, and public dungeons to get pouches and other loot.
This is more or less it about progressing your character. Even getting blue gear fully trained will already be a challenge. Getting purple items to max level is even more difficult and time consuming.
Once Again: A max-level blue weapon with full traits will do more damage than a max-level purple weapon without full traits in Throne and Liberty!
Leveling your Paladin Build in Throne and Liberty
The leveling progression in Throne and Liberty is easy. Follow the main story quest (Purple Markers) and you will hit max level at the end of the story. If your level is too low at any point, complete the Exploration quests (blue markers) in the areas you just completed. During this phase, the game will also teach you how to craft gear to get all green gear with some blues at the end of the story.
During this process, you also want to get used to your skills. Make sure to read all the skills so you know what they do! Also, test the skills out on monsters or the target dummies you can find, for example, in Vienta Village.
Once you are max level you should focus on getting good blues before you go for purple gear. I explained this above in the How to build your Character section. Maxed out blue gear with full traits is stronger than max level purple gear without maxed out traits. Blue gear is also a lot easier to get, see the Gear Progressions section of our Throne and Liberty Paladin Build.
Leveling Skills and Gear in Throne and Liberty

While leveling up, you will get plenty of upgrade materials, but eventually, you will have a shortage of these. So here are a few important tricks to keep progressing as fast as possible with your character build in Throne and Liberty.
Skills Progression:
- Upgrade all skills from green to blue first
- Upgrade all skills from blue to purple next
- Dissolve purple growth materials to get 10x the amount of the lower quality. That means 1 purple growth material will get you 10 blue growth materials.
- Doing Exploration quests will give you plenty of upgrade materials.
- Purchasing the Leveling Pass and Battle Pass will also give you plenty of growth materials. You can sell items in the Auction House to get Lucent without spending real money.
- Inside the store there is a section with Ornate coins where you can also purchase growth materials. Purchase the purple materials and dissolve them instead of buying blue materials directly (which is a lot more expensive).
- Ornate Coins are often received for maintenance downtime and other things like events.
Gear Progression:
- Green to Blue: A max level 6 green item infused into a blue item will become a level 3 blue.
- Blue to Purple: A max level 9 blue item infused into a purple item will become a level 6 purple.
- Fully gear yourself with blue items and trait them before you consider going purple. (Takes weeks or months).
- Look out for good blue items that give attribute stat points that you need for your build.
- A max-level blue weapon with full traits will do more damage than a max-level purple weapon without full traits.
- Dissolve purple growth materials to get 10x the amount of the lower quality. That means 1 purple growth material will get you 10 blue growth materials.
- Doing Exploration quests will give you plenty of upgrade materials.
- Purchasing the Leveling Pass and Battle Pass will also give you plenty of growth materials. You can sell items in Auction House to get Lucent without spending real money.
- Inside the store there is a section with Ornate coins where you can also purchase growth materials. Purchase and dissolve the purple materials instead of buying blue materials directly (which is a lot more expensive).
- Ornate Coins are often received for maintenance downtime and other things like events.
Paladin Build Basics in Throne and Liberty
This TL Paladin Sword, Shield, Wand & Tome build is mainly designed for use as a Tank. In this role, you deal much less damage than DPS players but you instead focus on taunting enemies to attack you, stunning and debuffing enemies, buffing allies and keeping them safe, and controlling and positioning battles in the safest and most efficient way for your group. Thanks to the inclusion of the Wand & Tome, the Paladin build can also do a decent job of healing itself or allies if needed.
Put simply, most fights as a tank will involve you using a taunt like Provoking Roar to get aggro of the enemies, then dealing damage and crowd control to the enemies to keep them focused on you. This role means that tanks tend to take much more attacks and damage than other players, so to cope with this they are often built more defensively with less focus on optimizing their damage output.
If you’re playing solo then you can swap to the solo skill setup (explained below) which will increase your damage potential enough to see you through most solo content in the game.
Skill Setups for our Paladin Tank Build in Throne and Liberty
Now, let’s look at the skill setups for our Throne and Liberty Paladin Build. We have two setups in this build:
- Tank Setup – This setup is what we use for the build’s primary purpose of tanking and supporting your allies in a group, such as in Co-Op dungeons or a guild raid.
- Solo Setup – If you’re playing solo and you need to push more damage to farm mobs or defeat solo bosses (like in Taedal’s Tower), use this setup instead. This is mainly focused on AoE damage and isn’t very good at single-target DPS, but you should still be able to manage most solo content in the game once you’re comfortable with it.
Tank Setup
The Tank Setup is the preferred option whenever you are playing as a tank/support role in a party with other players.
| Icon | Skill Name | Skill Spec |
|---|---|---|
 |
Shield Strike | Piercing Strike, Aggro Increased |
 |
Provoking Roar | Effect Duration, Cooldown Reduced |
 |
Shield Throw | Aggro Increased, Consecutive Use |
 |
Counter Barrier | Cooldown |
 |
Stalwart Bastion | None |
 |
Touch of Despair | Radius Increased, Effect Duration, Curse |
 |
Swift Healing | Healing Transfers, Consecutive Use |
 |
Blessed Barrier | None |
 |
Invincible Wall | Targets Expanded, Skill Distance Increased |
 |
A Shot at Victory | Annihilation Blade, Effect Boost, Effect Duration |
 |
Curse Explosion | Damage Increased |
 |
Time for Punishment | None |
Tanking Skills
The following skills are the most useful for tanking, helping you and your party to survive, while taunting and debuffing enemies.
- Provoking Roar – Use to aggro mobs and bosses
- Counter Barrier – Increases your Shield Block Chance
- Stalwart Bastion – Gives damage resistance for the party, which can be very useful in some dangerous boss mechanics.
- Blessed Barrier – A big buff to your defences and healing received.
- Invincible Wall – Provides your whole party with a shield, protecting them from harm
- Swift Healing – Self-heal for emergencies. Can also be used to help an ally.
- Time for Punishment – A debuff that you should put on bosses and powerful mobs. It reduces their damage resistance, helping your party’s DPS.
Damage Skills
When you have the battle under control and your tanking skills are on cooldown or not needed, you can use these skills to help your party push a bit of extra damage.
- Shield Survival Technique – Using this as your defensive skill allows you to access Retaliatory Strike, a fairly strong single-target strike, when you defend against Fury Attacks.
- Shield Strike – Deal damage in a conal AoE. Especially good for fighting groups of mobs.
- Shield Throw – Helps to keep enemies taunted and deals some decent AoE damage too.
- Touch of Despair – Put a DoT on the target that stacks up to three times
- Curse Explosion – Use your Curses to deal extra AoE damage.
- A Shot at Victory – A very strong directional AoE strike.
Tank & Healer Hybrid Option
If you’re feeling up to an additional challenge, you can easily convert this build into a hybrid tank & healer build, allowing you to perform both roles and have 5 damage dealers in your party instead of 4.
To do this, make the following skill changes:
- Change Curse Explosion to Fountain of Life – A powerful AoE heal that can also restore Mana
- Change Time for Punishment to Clay’s Salvation – A strong but expensive AoE burst heal
This won’t be as good at healing as a dedicated Healer build, but for many easier dungeons it can work out being more efficient to have one support player doing both roles, as long as the DPS players are decent at surviving by themselves.
Tank Setup Passives
| Icon | Name |
|---|---|
 |
Resilient Mind |
 |
Aegis Shield |
 |
Spectrum of Agony |
 |
Impenetrable |
 |
Wraith’s Beckon |
 |
Devotion and Emptiness |
 |
Selfless Soul |
 |
Noble Revival |
Solo Setup
The Solo Setup of the Paladin Build is designed for questing, farming and completing solo content like Taedal’s Tower. The Sword & Shield and Wand & Tome combo has the lowest DPS ceiling of any weapon combo in the game, so we are somewhat limited when it comes to damage output. However, once you’ve got some good gear, you should be able to produce enough DPS to manage most if not all solo content in TL.
| Icon | Skill Name | Skill Spec |
|---|---|---|
|
Shield Strike | None |
|
Provoking Roar | Effect Duration, Cooldown Reduced, Additional Damage |
|
Shield Throw | Consecutive Use |
|
Counter Barrier | Cooldown |
 |
Ray of Disaster | Cooldown |
|
Touch of Despair | Effect Duration, Curse |
 |
Karmic Haze | Unlucky Clock |
|
Blessed Barrier | Fighting Spirit Barrier, Duration Increased |
 |
Corrupted Magic Circle | Decaying Touch |
|
A Shot at Victory | Effect Boost, Effect Duration |
|
Curse Explosion | Damage Increased, Focused Target |
|
Time for Punishment | Enchanting Time, Effect Duration |
Solo Setup Passives
| Icon | Name |
|---|---|
|
Resilient Mind |
|
Aegis Shield |
|
Spectrum of Agony |
|
Impenetrable |
|
Wraith’s Beckon |
|
Devotion and Emptiness |
|
Selfless Soul |
 |
Vampiric Contract |
Skill Upgrade Priority
Progressing your skills in Throne and Liberty takes time. Therefore, it is important to first get all your used skills from green quality to blue quality. Green to blue is achieved fairly easily. After that, start going from blue to purple.
Tip: At the beginning, it makes sense to dissolve purple upgrade materials. Because 1 purple material will give you 10 blue materials. This way you can progress the blue quality faster. You could dissolve this even further, so technically, 1 purple upgrade material results in 100 green upgrade materials. Of course you can also craft some books, but dissolving is far more efficient than anything else.
Dissolve Upgrade Mats: 1 Purple > 10 Blue > 100 Green
IMPORTANT: Don’t dissolve OMNIPOTENT books (Purple growth books, says in the text on the book). These are special and can only be used for your special level 50 skills.
So that leaves us with a priority list for our Throne and Liberty Paladin Tank Build:
- Priority 1: Get all used skills from green to blue (if necessary, dissolve purple growth materials into blue and then into green like explained above.
- Priority 2: Get all skills from blue level 1 to purple level 1. This takes a bit more time. (Once again, dissolve purple growth materials into blue to get plenty of blue books.
- Priority 3: Purple skill progression to level 5
The reason we want to push as many skills to purple as possible, is because they often gain a new effect when going to a higher quality. Therefore, we want to achieve this quickly with as many skills. Afterward, from purple level 1 to max purple, there are only small differences.
Time estimate: Going from green to blue can be achieved after the end of the story + a few exploration quests. Going from blue to purple is a lot more tricky and might take 1-2 months. Going from purple level 1 to max purple will take months but isn’t that important since you only gain small extra stat boosts.
Weapon Mastery
For the Sword & Shield Weapon Mastery, focus on completing the Indomitable Spirit line first. This will grant you the best defensive buffs. Then, spend your remaining Mastery points on the Blade of Rage line, which will make you even more tanky and increase your Hit Chance.
For Wand & Tome Weapon Mastery, complete the Greedy Need line, which improves your damage and speeds up your Cooldowns. Then, split the remaining points between the other two lines, so that you eventually have both the Deep Pain and Spiritual Focus nodes unlocked.
Leveling up the Weapon Mastery to max 16 points takes a long time. You should be able to get to 8/9/10 fairly fast, but afterward, it starts dragging.

Attribute Stat Priority for our Paladin Tank Build
When adding stat bonuses to your Paladin build in Throne & Liberty, try to aim for the milestones at 30/40/50/60 or 70 points, because you gain special bonuses for hitting these numbers.
At the beginning, you won’t have many stats, but once you get decent blue gear you will notice that stats can go very high and this will increase your combat power tremendously.
The most obvious stat for a tank build to focus on is Strength, which will increase your max HP. However, the other stats are also useful. For example, Dexterity boosts our attack speed and crit chance, Wisdom increases Cooldown Speed, and Perception boosts Hit Chance and Buff Duration.
Your stat points will be twice as expensive after 20 points invested in a stat, so spread them out between stats to avoid this. Put 20 points in Strength, then focus on Dexterity next. After reaching max level and allocating all of your stat points, the remaining points will come from your gear.
Primary Stat Points:
- Strength
- Dexterity
We want to prioritise getting at least 50 points in our primary stats, before shifting focus to secondary stats.
Secondary Stat Points:
- Wisdom
- Perception
Gear Progression for our Throne and Liberty Paladin Build
The most difficult part of any build is the gear progression. This is where you will spend most of your time. With this Throne and Liberty Paladin Build we will have three different setups, Early Game, Mid Game and Endgame. It is important to understand that any gear is placeholder gear until the endgame setup, which means it’s okay to deviate somewhat from the early-game and mid-game setups. However, getting the End Game setup is no easy task because the items all drop in different parts of the game.
Important: Fully leveled blue gear with max traits is stronger than fully leveled purple gear with no traits. I mentioned this above in the Leveling Skills and Gear section.
That means it is best to focus on getting good blue items that give you extra stats (mid-game). After you have all that, you want to start farming for the end-game gear. Getting purple items is often not even the problem, but traiting them is insanely expensive, especially for meta gear.
You will find three different setups below:
- Early Game Setup: Easy to get gear from your Lithograph Book
- Mid Game Setup: Co-Op Dungeon and Public Dungeon Gear
- End Game Setup: Co-Op Dungeon and World Boss Gear
Early Game Setup
The Early Game setup for the Throne and Liberty Paladin Tank Build can be obtained very fast after you start doing your dailies. It is important to understand that it doesn’t matter if you don’t have all the pieces. Generally, aim to get as many blue items as possible here fast. I call this “quick wins” because it is easy to get these blue items since most come from the Lithograph Book in Throne and Liberty.
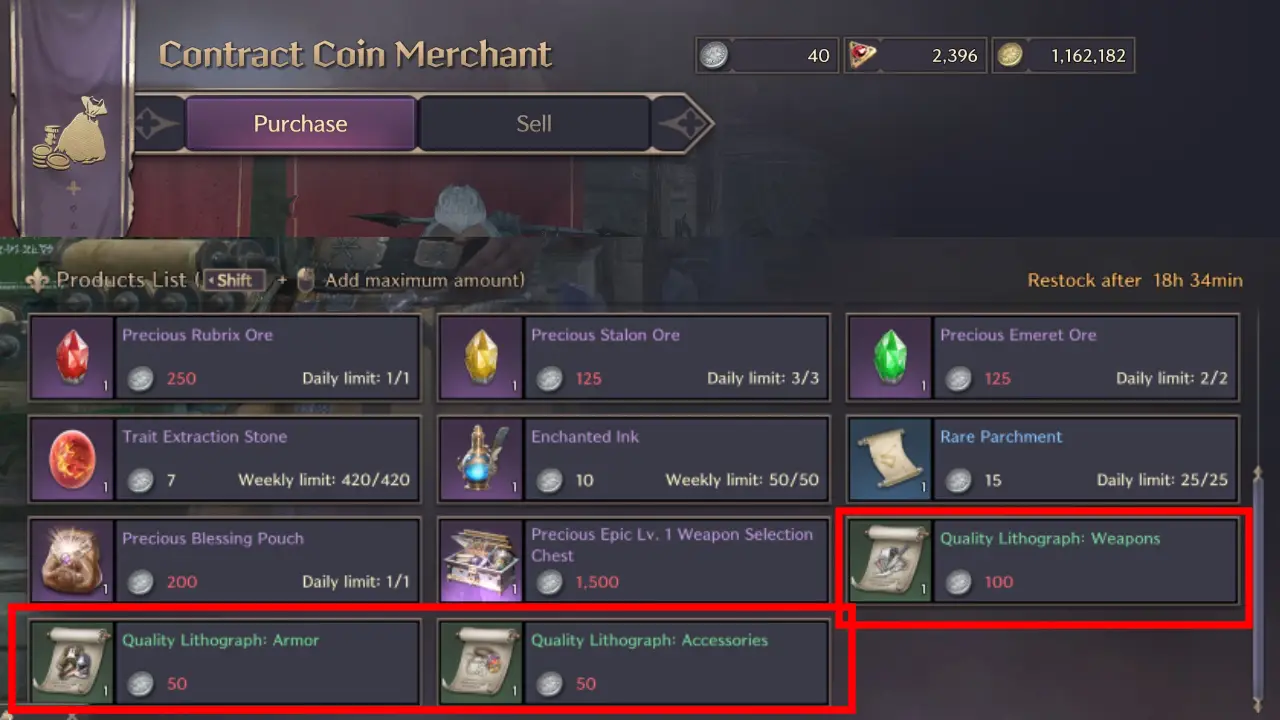
IMPORTANT: By doing your dailies you get Contract Coins (Always do them in high level areas for max gains). With the Contract Coins, you can buy Quality Lithographs: Weapons, Accessories, and Armor. These can be used to craft green items you put into your Lithograph Book to get blue items. This is how you get your first blue items easily!
LB = Lithograph Book
Every time you have enough materials to craft an item, immediately go for it.
| Icon | Type | Item | Drop Location |
|---|---|---|---|
 |
Main Hand | Blade of the Resistance | LB Deadly Swords |
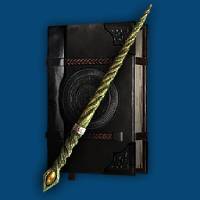 |
Off Hand | Scepter of the Resistance | LB Mystical Wands |
 |
Head | Augmented Leather Headgear | Crafted |
 |
Cloak | Cloak of Accuracy | Crafted |
 |
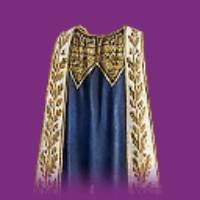
Chest | Ironclad Plate Cuirass | Crafted |
 |
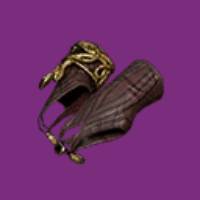
Gloves | Fortune Telling Gloves | Crafted |
 |
Pants | Armored Suede Trousers | Crafted |
 |
Boots | Augmented Leather Boots | Crafted |
 |
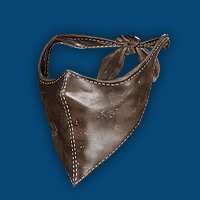
Necklace | Rutaine’s Necklace of Wonder | Syleus’s Abyss 1F-2F Exploration Codex. |
 |
Bracelet | Bracelet of Conquest | Crafted |
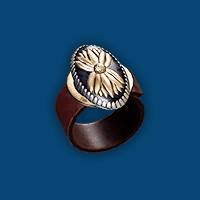 |
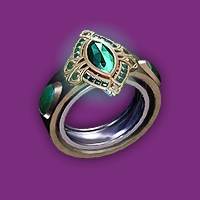
Ring | Violent Signet | LB Elemental Rings |
 |
Ring | Rutaine’s Ring of Wonder | Adventure Codex Chapter 4 – Optional Completion Reward |
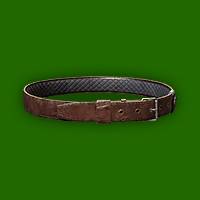 |
Belt | Belt of Vigor | Crafted |
Mid Game Setup
The Mid Game setup for our Throne and Liberty Paladin Build is where you will spend most of your time because it is incredibly hard to get End Game equipment.
Don’t grind just one dungeon for loot! This is the number one mistake of getting gear from Co-Op Dungeons. There is a mathematically faster way to get gear from dungeons.
- In Stonegard there are purple item crafters (Map).
- Check all of them and read carefully what you need to craft items (Also check the Treasure Chests!)
- To craft purple dungeon weapons you need 2 Dimensional Essence: Salvation
- For each Dungeon completion, you get 4 Dimensional Soul Shards when you open a chest at the end.
- That means, if you run each dungeon 5 times you can craft the weapon of your choice.
- Purple Jewelry can be obtained via Chests from the Accessories Crafter in Stonegard too (Map).
RANDOM QUEUE: If you use the random queue system, you also have a small chance to get a Dimensional Essence: Salvation.
It is mathematically faster to rotate dungeons and then simply craft the purple item of your choice rather than getting a lucky drop at 2-5% drop chance.
Auction House: Check the Auction house for blue item lithographs. Sometimes, they can be cheap, so you can buy them and craft the item directly.
That means getting the items below is mostly farming Co-Op Dungeons and doing Public Dungeons to get enough currency to craft the purple items. Blue item drop chances are mostly fine in dungeons so you should be able to get them eventually. But focus on the purple items!
| Icon | Type | Item | Drop Location |
|---|---|---|---|
 |
Main Hand | Karnix’s Netherblade | Co-Op Death’s Abyss |
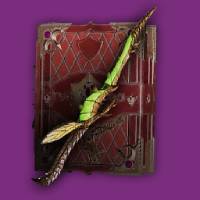 |
Off Hand | Lequirus’s Coveted Tome | Co-Op Cave of Destruction |
 |
Head | Mask of the Resistance | LB: Hawk’s Eye |
 |
Cloak | Deadeye’s Cloak | LB: Beginner Cloaks of Victory |
 |
Chest | Glade Stalker Scales | LB: Standard Defense Collection |
 |
Gloves | Nature’s End Gloves | Co-Op Cave of Desperation & Temple of Slaughter |
 |
Pants | Elusive Hexweaver Pants | Excavator-9 World Boss, Crafted |
 |
Boots | Glade Stalker Boots | LB: Offroad Footwear |
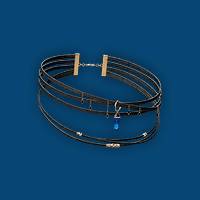 |
Necklace | Ecliptic Pendant | Co-Op Butcher’s Canyon, Lv.6 Rare Accessories Selection Chest, Lv.6 Rare Necklace Selection Chest |
 |
Bracelet | Kunzite Bangle | LB: Elemental Bracelets |
|
Ring | Violent Signet | LB Elemental Rings |
 |
Ring | Platinum Skull Band | Co-Op Death’s Abyss, Lv.6 Rare Accessories Selection Chest, Lv.6 Rare Ring Selection Chest |
|
Belt | Belt of Vigor | Crafted |
Best in slot traits:
- Sword & Shield – Hit Chance, Heavy Attack Chance, Max Health
- Wand & Tome – Hit Chance, Heavy Attack Chance, Buff Duration
For the blue gear it doesn’t matter that much because it will be replaced, but if you can go with Max Health traits.
End Game Setup
The End Game Setup for the Throne and Liberty Paladin Build is the best in slot setup that we’re aiming for. This will take a long time to achieve. You might be able to get the items needed in a decent time, but traiting them is incredibly time consuming.
Getting World Boss loot is very difficult unless you have a good guild that splits up the loot. If you aren’t in a guild it is very unlikely that you will manage to get any endgame gear unless you buy most of it via the Auction House.


Best in slot traits:
- Sword & Shield – Hit Chance, Heavy Attack Chance, Max Health
- Wand & Tome – Hit Chance, Heavy Attack Chance, Buff Duration
- Helmet – Ranged Evason, Cooldown Speed, Mana Regen
- Cloak – Mana Regen, Skill Damage Resistance, Debuff Duration
- Chest – Ranged Evasion, Melee Evasion, Max Health
- Gloves – Max Mana, Attack Speed, Melee Evasion
- Legs – Ranged Evasion, Max Mana, Mana Regen
- Boots – Melee Evasion, Ranged Evasion, Max Health
- Necklace – Skill Damage Boost, Max Health, Buff Duration
- Bracelet – Mana Regen, Skill Damage Resistance, Debuff Duration
- Both Rings – Max Health, Skill Damage Boost, Buff Duration
- Belt – Max Health, Skill Damage Resistance, Debuff Duration
Guardians for your Paladin Build in Throne and Liberty
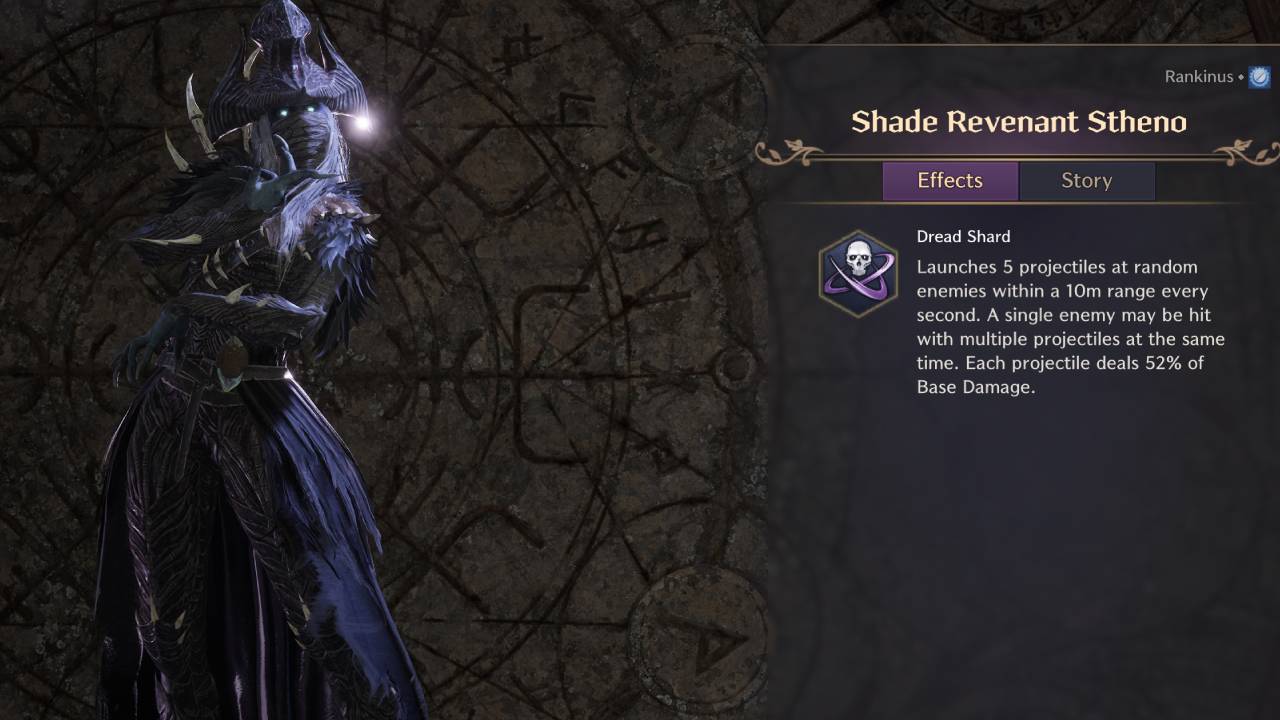
Guardians are special transformations that have a 10 minute cooldown. They have various effects; for our Paladin Build, we’re using the Shade Revenant Stheno Guardian. The main reason for this choice is simply that Stheno does the most DPS on average, as he shoots lots of projectiles at nearby enemies.
You can try the other Guardians if you want though, the difference is quite small.
Buff Food & Potions
Buff Food and Potions are an important part of any Throne and Liberty Build. It is recommended to level up cooking because some of the later buff foods are very strong. However, for most content right now Vegetable Stir-fry will do. It increases your Max Health and Health Regen for 15-30 minutes.

The post Throne and Liberty Paladin Tank Build – Sword Shield Wand Tome appeared first on AlcastHQ.


