
Best Staff and Dagger Build for Throne and Liberty
Welcome to our Throne and Liberty Staff and Dagger build. This DPS build deals excellent AoE damage, enhanced by the high Critical stats of the Daggers, making it ideal for most PvE content, including Co-Op dungeons and farming in public dungeons. There are two Skill Setups for this build, one which is designed for fighting bosses and a full AoE setup for farming mobs – both of these are described in the guide below.
For a full overview of all builds please visit the Throne and Liberty Builds Database.
Since creating and fully optimizing a Throne & Liberty build is a long and complex process, this guide will not only explain how to create the build and how it works but also has early and midgame setups and suggestions about which aspects of the build to prioritize farming, crafting or upgrading.
Mainhand: Staff
Offhand: Dagger
Table of Contents:
- How to build your Character [Important]
- Leveling Character
- Leveling Skills and Gear
- Staff & Dagger Basics
- Skill Setups
- Attribute Stat Priority
- Gear Progression
- Guardians
- Buff Food & Potions
How to Build Your Staff & Dagger DPS Character in Throne and Liberty
Playing Throne and Liberty can be overwhelming at first. In this section, I want to explain quickly how your character build progression works in this game. Leveling up to max level is easy and won’t take long, just follow the main story purple quests and you will hit max level at the end of the story. During this period the game teaches you how to craft gear, this will allow you to get full green gear fairly fast while also working on some basic blue items.
Now you are at max level, you can get some easy wins with the Lithograph Book (Check Menu in-game). This allows you to sacrifice certain items and in return you get better items. So you can get slightly better blue gear.
Important: Now, this is where most players make a big mistake. They want to start going from blue to purple gear. But this is too early! The main strength of gear comes from attribute stats (buffs to Strength, Dexterity, etc) and traits. Fully traiting a purple item is impossible as a new player unless you swipe your credit card. Therefore, you want to first get good blue gear with good attribute stats and good traits before you even consider going after purple gear.
It is best to either bank purple items you drop or sell them at the Auction House if they are worth a lot. You don’t sell items in this game, you sell the extract of it with the trait. Traits are the most important aspect of this game and is where most of your time commitment will be.

You always want to level up your blue gear too. You won’t lose any materials on this, because you can transfer the level and trait power of a blue item into a Purple item. So a level 9 blue item transferred into a purple will result in a level 6 purple item. The blue traits will disappear but the purple item gets “trait blessing”. This makes it cheaper to get your purple item traited.
Once you have good blue gear, then you can think about starting to equip purple items! Finding a purple item isn’t necessarily difficult, but fully traiting and maxing it out definitely is!
- Leveling up is easy, follow purple main story quest to hit max level.
- While leveling, you get green items and a few blue items.
- After max level, focus on getting good blue gear.
- Don’t focus on purple items yet! (Rookie Mistake)
- Focus on getting good blue items to max level and fully traiting them
- After that, you can think about starting to equip purple items.
- Max level blue gear with full traits is better than non-maxed purple gear with no traits.
- Do your dailies, co-op dungeons, and public dungeons to get pouches and other loot.
This is more or less it about progressing your character. Even getting blue gear fully trained will already be a challenge. Getting purple items to max level is even more difficult and time consuming.
Once Again: A max-level blue weapon with full traits will do more damage than a max-level purple weapon without full traits in Throne and Liberty!
Leveling your Staff & Dagger Build in Throne and Liberty
The leveling progression in Throne and Liberty is easy. Follow the main story quest (Purple Markers) and you will hit max level at the end of the story. If your level is too low at any point, complete the Exploration quests (blue markers) in the areas you just completed. During this phase, the game will also teach you how to craft gear to get all green gear with some blues at the end of the story.
During this process, you also want to get used to your skills. Make sure to read all the skills so you know what they do! Also, test the skills out on monsters or the target dummies you can find, for example, in Vienta Village.
Once you are max level you should focus on getting good blues before you go for purple gear. I explained this above in the How to build your Character section. Maxed out blue gear with full traits is stronger than max level purple gear without maxed out traits. Blue gear is also a lot easier to get, see the Gear Progressions section of our Throne and Liberty Staff and Dagger DPS Build.
Leveling Skills and Gear in Throne and Liberty

While leveling up, you will get plenty of upgrade materials, but eventually, you will have a shortage of these. So here are a few important tricks to keep progressing as fast as possible with your character build in Throne and Liberty.
Skills Progression:
- Upgrade all skills from green to blue first
- Upgrade all skills from blue to purple next
- Dissolve purple growth materials to get 10x the amount of the lower quality. That means 1 purple growth material will get you 10 blue growth materials.
- Doing Exploration quests will give you plenty of upgrade materials.
- Purchasing the Leveling Pass and Battle Pass will also give you plenty of growth materials. You can sell items in the Auction House to get Lucent without spending real money.
- Inside the store there is a section with Ornate coins where you can also purchase growth materials. Purchase the purple materials and dissolve them instead of buying blue materials directly (which is a lot more expensive).
- Ornate Coins are often received for maintenance downtime and other things like events.
Gear Progression:
- Green to Blue: A max level 6 green item infused into a blue item will become a level 3 blue.
- Blue to Purple: A max level 9 blue item infused into a purple item will become a level 6 purple.
- Fully gear yourself with blue items and trait them before you consider going purple. (Takes weeks or months).
- Look out for good blue items that give attribute stat points that you need for your build.
- A max-level blue weapon with full traits will do more damage than a max-level purple weapon without full traits.
- Dissolve purple growth materials to get 10x the amount of the lower quality. That means 1 purple growth material will get you 10 blue growth materials.
- Doing Exploration quests will give you plenty of upgrade materials.
- Purchasing the Leveling Pass and Battle Pass will also give you plenty of growth materials. You can sell items in Auction House to get Lucent without spending real money.
- Inside the store there is a section with Ornate coins where you can also purchase growth materials. Purchase and dissolve the purple materials instead of buying blue materials directly (which is a lot more expensive).
- Ornate Coins are often received for maintenance downtime and other things like events.
Staff & Dagger Build Basics in Throne and Liberty
This Staff & Dagger build for Throne & Liberty combines the supreme AoE DPS potential of the Staff with the high Critical Chance of the Daggers, creating one of the best combinations for PvE DPS in the game. This build is also excellent for farming in public dungeons, thanks to its huge AoE damage output. While this build is most well-suited to AoE damage, it is still decent at sustained single-target damage against bosses.
The standard version of this build involves stacking up the Burn and Thunderclouds debuffs on your target, then hitting them with devastating bursts of damage. This setup still retains good AoE potential, which is almost unavoidable anyway since the Staff has so many good AoE skills. However, the AoE version of the build is intended for farming mobs and maximises your AoE damage potential.
Skill Setups for our Staff and Dagger Build in Throne and Liberty
Now, let’s look at the skill setups for our Throne and Liberty Staff and Dagger Build. We have two setups in this build:
- Standard Setup – Has decent AoE damage but places much more emphasis on single-target and burst damage, ideal for fighting bosses in Co-Op Dungeons and Guild Raids.
- AoE Setup – Fully focused on dealing as much AoE damage as possible. Ideal setup for farming mobs in public dungeons.
Standard Setup
| Icon | Skill Name | Skill Spec |
|---|---|---|
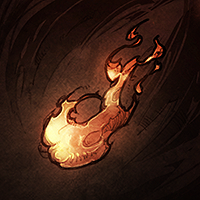 |
Serial Fire Bombs | Focused Fire Bombs, Mobility |
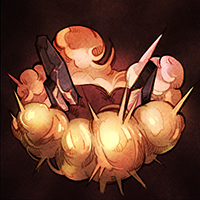 |
Inferno Wave | Cooldown, Consecutive Use, Burning |
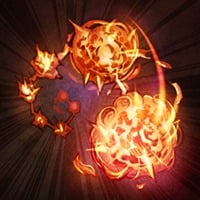 |
Fireball Barrage | Fireball Frenzy |
 |
Infernal Meteor | Hellfire Rain |
 |
Inject Venom | Lightning Infusion, Cooldown Reduction |
 |
High Focus | Base Damage Boost |
 |
Cleaving Moonlight | Consecutive Use, Attack Speed |
 |
Judgment Lightning | None |
 |
Ice Spear | Ice Spear Bombardment, Damage Increase |
 |
Ankle Strike | Off-Hand Weapon Activation |
 |
Brutal Incision | Thunderclouds Bombing, Cooldown Reduction |
 |
Inner Peace | None |
Important Damage Skills
- Focused Fire Bombs – Great for stacking up the Burn effect, which deals damage over time and enhances the damage of some other skills. Burn can be stacked up to 20 times per target.
- Inferno Wave – Deals more damage depending on Burn stacks, and also adds more Burn.
- Lightning Infusion – Infuses Thunderclouds in all of your attacks, allowing you to quickly build up stacks of Thunderclouds on the enemy. You should have this active as much as possible. At the maximum of 20 stacks, use Thunderclouds Bombing to consume the stacks and deal a powerful burst of damage.
- Cleaving Moonlight – Increases your Attack Speed, which is vital for improving your overall DPS.
- Ankle Strike – Thanks to our chosen specialisation, this allows you to increase your Offhand Activation Rate. Use it immediately before other damage skills like Cleaving Moonlight and Thunderclouds Bombing for a chance to increase their damage output.
- Judgment Lightning, Fireball Barrage – Powerful single-target damage that is easy to use.
- Hellfire Rain – This is a great AoE skill. Against monstrous bosses with a large hitbox, it also works as a powerful single-target attack, because the large hitbox causes most or all of the meteors to hit the boss.
- High Focus – Doesn’t deal damage on its own, but increases your Maximum Base Damage (which effectively increases the damage of your Critical Hits, too) and Cooldown Speed when active. Use it as often as possible to maximise your DPS.
Standard Setup Passives
| Icon | Name |
|---|---|
 |
Asceticism |
 |
Mana Amp |
 |
Flame Condensation |
 |
Forbidden Sanctuary |
 |
Assassin’s Instincts |
 |
Wrathful Edge |
 |
Destructive Fang |
 |
Murderous Energy |
AoE Version
| Icon | Skill Name | Skill Spec |
|---|---|---|
|
Serial Fire Bombs | Focused Fire Bombs, Mobility, Radius Increased, Projectile Speed Increased |
|
Inferno Wave | Cooldown, Consecutive Use |
|
Infernal Meteor | Cooldown |
|
High Focus | Base Damage Boost |
 |
Chain Lightning | Chain Lightning, Damage Transfer, Damage Transfer |
|
Judgment Lightning | Damage Transfer, Damage Transfer |
|
Ice Spear | Ice Spear Bombardment, Damage Increase |
|
Inner Peace | Immune to CC |
 |
Camouflage Cloak | CC Immunity |
 |
Icebound Tomb | Bind, Icy Mire |
|
Cleaving Moonlight | Consecutive Use |
|
Brutal Incision | None |
For this AoE setup, replace the Murderous Energy passive with Assassin’s Step to increase your mobility and sustain. Other than this change, the passives are the same as the Standard version described above.
Skill Upgrade Priority
Progressing your skills in Throne and Liberty takes time. Therefore, it is important to first get all your used skills from green quality to blue quality. Green to blue is achieved fairly easily. After that, start going from blue to purple.
Tip: At the beginning, it makes sense to dissolve purple upgrade materials. Because 1 purple material will give you 10 blue materials. This way you can progress the blue quality faster. You could dissolve this even further, so technically, 1 purple upgrade material results in 100 green upgrade materials. Of course you can also craft some books, but dissolving is far more efficient than anything else.
Dissolve Upgrade Mats: 1 Purple > 10 Blue > 100 Green
IMPORTANT: Don’t dissolve OMNIPOTENT books (Purple growth books, says in the text on the book). These are special and can only be used for your special level 50 skills.
So that leaves us with a priority list for our Throne and Liberty Staff & Dagger Build:
- Priority 1: Get all used skills from green to blue (if necessary, dissolve purple growth materials into blue and then into green like explained above.
- Priority 2: Get all skills from blue level 1 to purple level 1. This takes a bit more time. (Once again, dissolve purple growth materials into blue to get plenty of blue books.
- Priority 3: Purple skill progression to level 5
The reason we want to push as many skills to purple as possible, is because they often gain a new effect when going to a higher quality. Therefore, we want to achieve this quickly with as many skills. Afterward, from purple level 1 to max purple, there are only small differences.
Time estimate: Going from green to blue can be achieved after the end of the story + a few exploration quests. Going from blue to purple is a lot more tricky and might take 1-2 months. Going from purple level 1 to max purple will take months but isn’t that important since you only gain small extra stat boosts.
Weapon Mastery
For the Staff Weapon Mastery, focus on completing the Brutal Destruction line first, which gives the best overall DPS increase. Put the rest of your points in the Strange Spacetime line, which boosts your sustain and damage.
For Dagger Weapon Mastery, fully unlock the Shrewd Judgment line first, which gives a range of buffs. Then put the rest of your points into the Brutal Wound line, which gives you some additional damage boosts.
Leveling up the Weapon Mastery to max 16 points takes a long time. You should be able to get to 8/9/10 fairly fast, but afterward, it starts dragging.

Attribute Stat Priority for our Staff & Dagger Build
When adding stat bonuses to your Staff and Dagger build in Throne & Liberty, try to aim for the milestones at 30/40/50/60 or 70 points, because you gain special bonuses for hitting these numbers.
At the beginning, you won’t have many stats, but once you get decent blue gear you will notice that stats can go very high and this will increase your combat power tremendously.
Your stat allocation mainly depends on your equipment, which will give you a lot of extra stats. Respec when you get better equipment and reallocate your points to hit as many of the milestones as possible. Dexterity and Wisdom are slightly more useful than the other two stats for this build, but all four stats are good, so try to make the best of your equipment.
Primary Stat Points:
- Dexterity
- Wisdom
Secondary Stat Points:
- Strength
- Perception
Gear Progression for our Throne and Liberty Staff & Dagger Build
The most difficult part of any build is the gear progression. This is where you will spend most of your time. With this Throne and Liberty Staff & Dagger Build we will have three different setups, Early Game, Mid Game and Endgame. It is important to understand that any gear is placeholder gear until the endgame setup, which means it’s okay to deviate somewhat from the early-game and mid-game setups. However, getting the End Game setup is no easy task because the items all drop in different parts of the game.
Important: Fully leveled blue gear with max traits is stronger than fully leveled purple gear with no traits. I mentioned this above in the Leveling Skills and Gear section.
That means it is best to focus on getting good blue items that give you extra stats (mid-game). After you have all that, you want to start farming for the end-game gear. Getting purple items is often not even the problem, but traiting them is insanely expensive, especially for meta gear.
You will find three different setups below:
- Early Game Setup: Easy to get gear from your Lithograph Book
- Mid Game Setup: Co-Op Dungeon and Public Dungeon Gear
- End Game Setup: Co-Op Dungeon and World Boss Gear
Early Game Setup
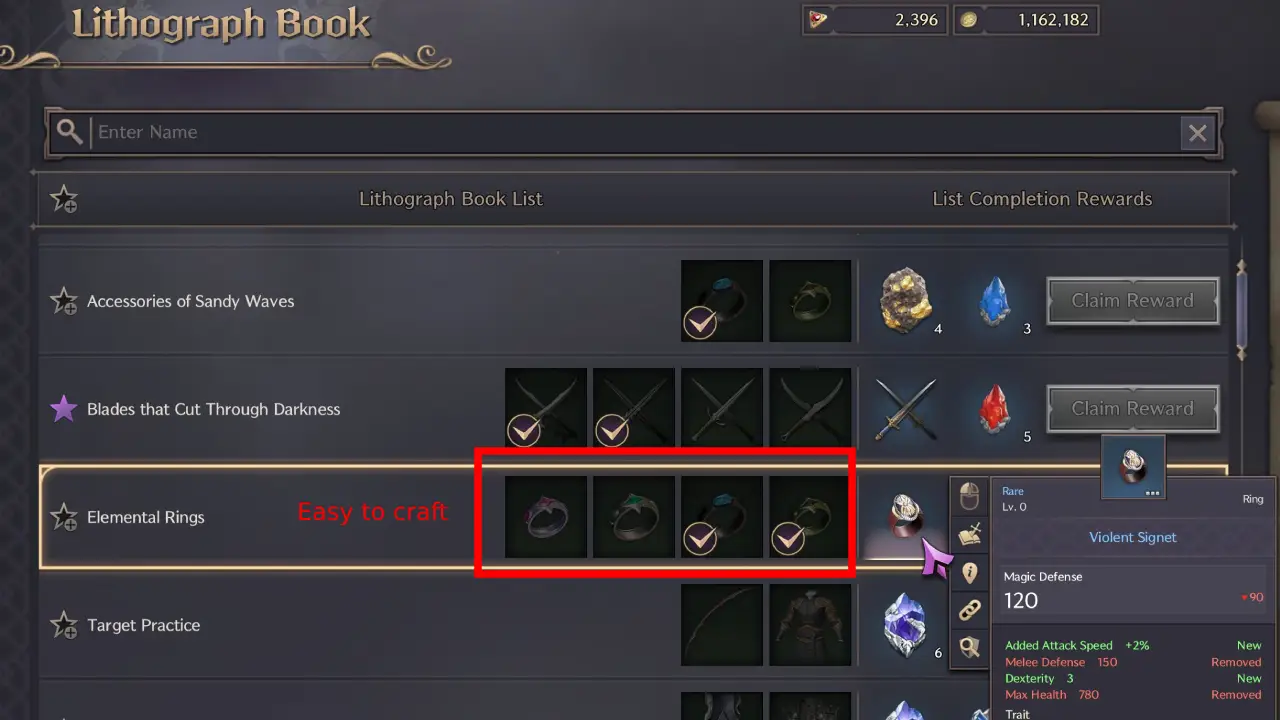
The Early Game setup for the Throne and Liberty Staff & Dagger DPS Build can be obtained very fast after you start doing your dailies. It is important to understand that it doesn’t matter if you don’t have all the pieces. Generally, aim to get as many blue items as possible here fast. I call this “quick wins” because it is easy to get these blue items since most come from the Lithograph Book in Throne and Liberty.
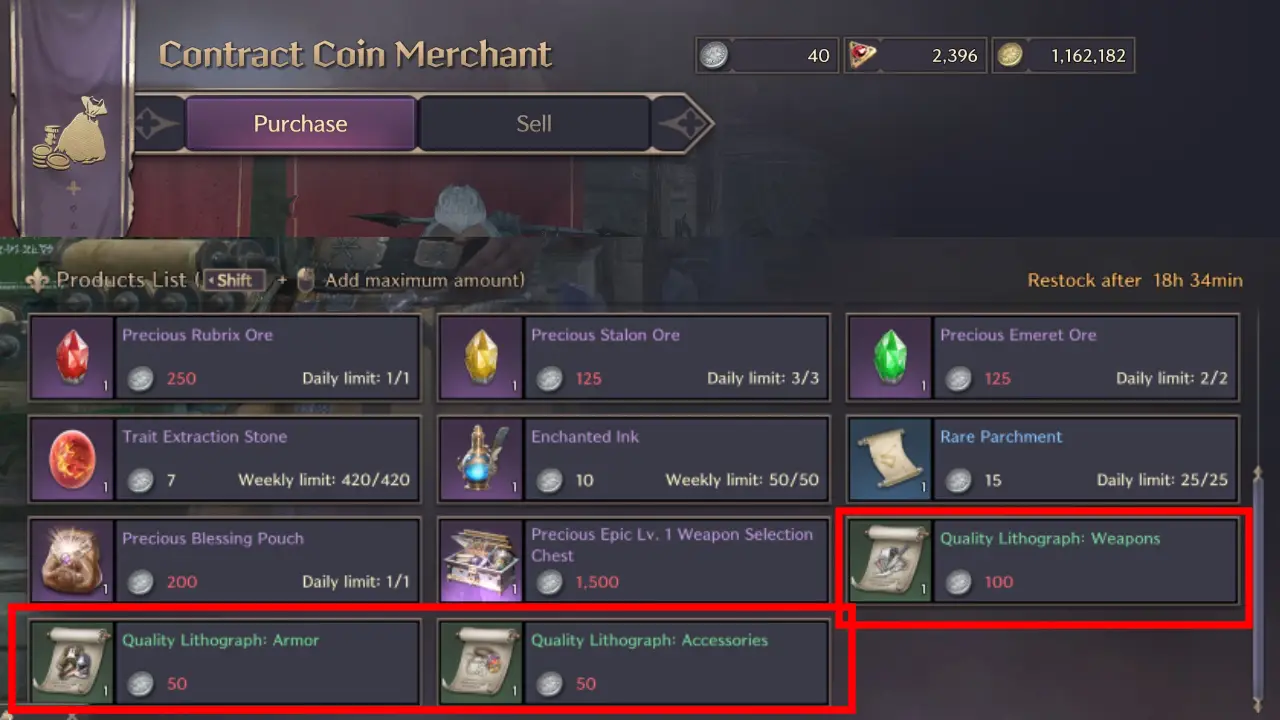
IMPORTANT: By doing your dailies you get Contract Coins (Always do them in high level areas for max gains). With the Contract Coins, you can buy Quality Lithographs: Weapons, Accessories, and Armor. These can be used to craft green items you put into your Lithograph Book to get blue items. This is how you get your first blue items easily!
LB = Lithograph Book
Every time you have enough materials to craft an item, immediately go for it.
| Icon | Type | Item | Drop Location |
|---|---|---|---|
 |
Main Hand | Staff of the Resistance | LB Archwizard’s Lost Staves |
 |
Off Hand | Daggers of the Resistance | LB Blades that Cut through Darkness |
 |
Head | Mask of the Resistance | LB Hawk’s Eye |
 |
Cloak | Deadeye’s Cloak | LB Beginner’s Cloaks of Victory |
 |
Chest | Heroic Armor of the Resistance | LB Unfaltering Protection, Precious Blessing Pouch |
 |
Gloves | Glade Stalker Gloves | LB Resolve-Giving Gloves, Co-Op Cave of Destruction & Cave of Desperation |
 |
Pants | Trousers of the Resistance | LB Trapper’s Reliable Pants |
 |
Boots | Glade Stalker Boots | LB Offroad Footwear |
 |
Necklace | Necklace of Clarity | Crafted |
 |
Bracelet | Bracelet of Conquest | Crafted |
 |
Ring | Violent Signet | LB Elemental Rings |
 |
Ring | Ring of Precision | Crafted |
 |
Belt | Belt of Meditation | Crafted |
Mid Game Setup
The Mid Game setup for our Throne and Liberty Staff and Dagger Build is where you will spend most of your time because it is incredibly hard to get End Game equipment.
Don’t grind just one dungeon for loot! This is the number one mistake of getting gear from Co-Op Dungeons. There is a mathematically faster way to get gear from dungeons.
- In Stonegard there are purple item crafters (Map).
- Check all of them and read carefully what you need to craft items (Also check the Treasure Chests!)
- To craft purple dungeon weapons you need 2 Dimensional Essence: Salvation
- For each Dungeon completion, you get 4 Dimensional Soul Shards when you open a chest at the end.
- That means, if you run each dungeon 5 times you can craft the weapon of your choice.
- Purple Jewelry can be obtained via Chests from the Accessories Crafter in Stonegard too (Map).
RANDOM QUEUE: If you use the random queue system, you also have a small chance to get a Dimensional Essence: Salvation.
It is mathematically faster to rotate dungeons and then simply craft the purple item of your choice rather than getting a lucky drop at 2-5% drop chance.
Auction House: Check the Auction house for blue item lithographs. Sometimes, they can be cheap, so you can buy them and craft the item directly.
That means getting the items below is mostly farming Co-Op Dungeons and doing Public Dungeons to get enough currency to craft the purple items. Blue item drop chances are mostly fine in dungeons so you should be able to get them eventually. But focus on the purple items!
| Icon | Type | Item | Drop Location |
|---|---|---|---|
 |
Main Hand | Toublek’s Shattering Quarterstaff | Co-Op Tyrant’s Isle |
 |
Off Hand | Lequirius’s Wicked Thorns | Co-Op Cave of Destruction, Craftable |
 |
Head | Elusive Hexweaver Hat | Co-Op Valley of Slaughter, Excavator-9 World Boss |
 |
Cloak | Supreme Devotion | Co-Op Cave of Destruction |
 |
Chest | Ruthless Enforcer Chest Plate | Co-Op Tyrant’s Isle |
 |
Gloves | Duskblood Gloves | Aridus in Syleus’s Abyss, Precious Blessing Pouch: Tyrant |
 |
Pants | Duskblood Trousers | Kowazan World Boss, Precious Blessing Pouch: Shadow |
 |
Boots | Shadow Harvester Boots | Co-Op Carmine Rage Island |
 |
Necklace | Ornate Choker | Co-Op Valley of Slaughter, Grand Aelon World Boss, Precious Blessing Pouch: Desire |
 |
Bracelet | Ancient Saurodoma Bracers | Co-Op Tyrant’s Isle |
|
Ring | Violent Signet | LB Elemental Rings |
 |
Ring | Amber Dimensional Band | Precious Epic Accessory Selection Chest |
|
Belt | Belt of Meditation | Crafted |
Best in slot traits:
- Staff – Hit Chance, Heavy Attack Chance, Cooldown Speed
- Daggers – Hit Chance, Critical Hit Chance, Heavy Attack Chance
For the blue gear it doesn’t matter that much because it will be replaced, but if you can go with Max Health traits.
End Game Setup
The End Game Setup for the Throne and Liberty Staff & Dagger Build is the best in slot setup that you want to aim for. This will take a long time to achieve. You might be able to get the items needed in a decent time, but traiting them is incredibly time consuming.
Getting World Boss loot is very difficult unless you have a good guild that splits up the loot. If you aren’t in a guild it is very unlikely that you will manage to get any endgame gear unless you buy most of it via the Auction House.
| Icon | Type | Item | Drop Location |
|---|---|---|---|
 |
Main Hand | Aridus’s Gnarled Staff | Aridus Boss in Syleus’s Abyss, Aridus Equipment Selection Chest |
|
Off Hand | Lequirius’s Wicked Thorns | Co-Op Cave of Destruction, Craftable |
 |
Head | Shadow Harvester Mask | Adentus World Boss, Armour Chest – Death |
|
Cloak | Supreme Devotion | Co-Op Cave of Destruction, Lequirius’s Equipment Selection Chest |
 |
Chest | Swirling Essence Robe | Co-Op Island of Terror, Tax Delivery Armor Reward Chest, Precious Blessing Pouch: Tyrant |
 |
Gloves | Gauntlets of the Field General | Aridus in Syleus’s Abyss, Precious Blessing Pouch: Abyss |
 |
Pants | Greaves of the Field General | Grand Aelon World Boss, Armor Chest – Imperator |
|
Boots | Shadow Harvester Boots | Co-Op Carmine Rage Island |
 |
Necklace | Slayer’s Quicksilver Pendant | Co-Op Valley of Slaughter |
|
Bracelet | Ancient Saurodoma Bracers | Co-Op Tyrant’s Isle |
 |
Ring | Band of Universal Power | Queen Bellandir Archboss |
|
Ring | Amber Dimensional Band | Precious Epic Accessory Selection Chest |
 |
Belt | Forbidden Arcane Chain | Co-Op Voidwastes |
Best in slot traits:
- Staff – Hit Chance, Heavy Attack Chance, Cooldown Speed
- Daggers – Hit Chance, Heavy Attack Chance, Crit Chance
- Helmet – Ranged Evason, Cooldown Speed, Mana Regen
- Cloak – Mana Regen, Skill Damage Resistance, Debuff Duration
- Chest – Buff Duration, Melee Evasion, Mana Regen
- Gloves – Max Health, Attack Speed, Melee Evasion
- Legs – Ranged Evasion, Debuff Duration, Max Health
- Boots – Movement Speed, Ranged Evasion, Magic Evasion
- Necklace – Skill Damage Boost, Max Health, Buff Duration
- Bracelet – Skill Damage Resistance, Mana Regen, Debuff Duration
- Ring 1 – Max Health, Skill Damage Boost, Buff Duration
- Ring 2 – Skill Damage Boost, Buff Duration, Mana Regen
- Belt – Mana Regen, Skill Damage Resistance, Debuff Duration
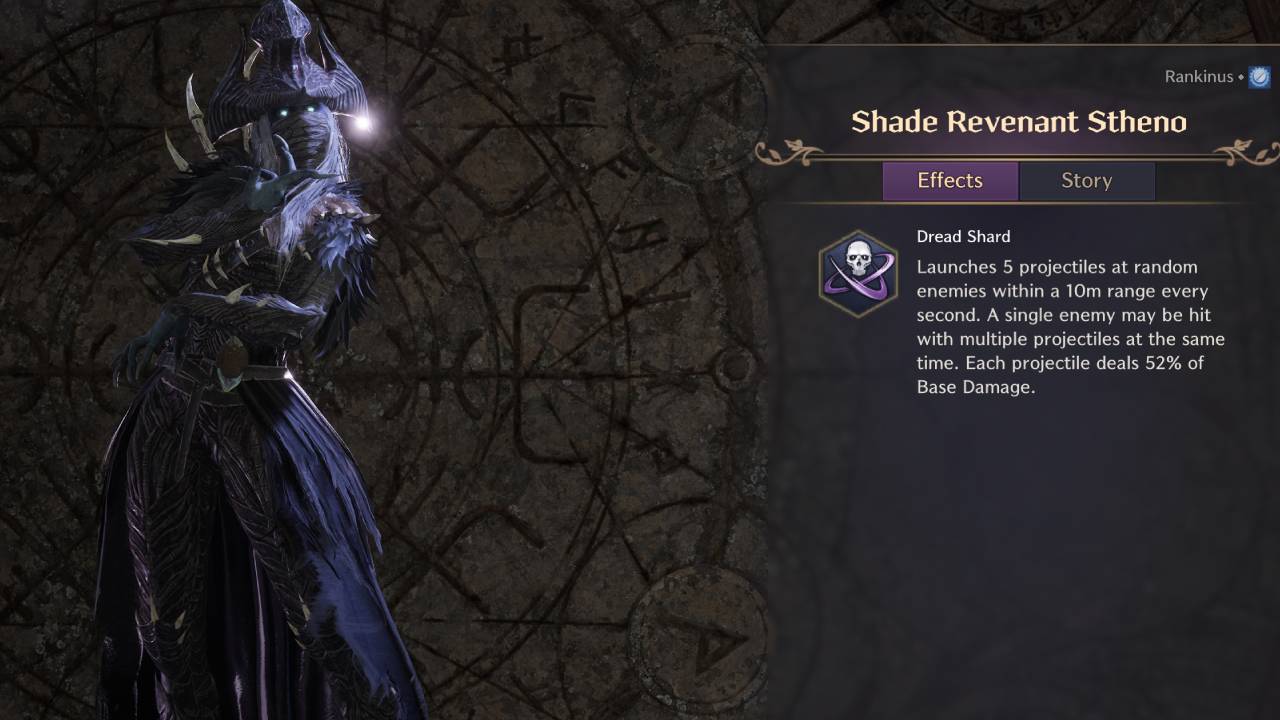
Guardians for your Staff & Dagger Build in Throne and Liberty
Guardians are special transformations that have a 10 minute cooldown. They have various effects; for our Staff and Dagger Build, we’re using the Shade Revenant Stheno Guardian. This Guardian shoots lots of projectiles at nearby enemies when active. The projectiles don’t do much damage individually, but since there are a lot of them, using Stheno gives a modest DPS improvement.
Buff Food & Potions
Buff Food and Potions are an important part of any Throne and Liberty Build. It is recommended to level up cooking because some of the later buff foods are very strong. However, for most content right now Vegetable Stir-fry will do. It increases your Max Health and Health Regen for 15-30 minutes.
Fried Egg is also a good option if you want to deal some extra damage on bosses.

The post Best Staff and Dagger Build for Throne and Liberty appeared first on AlcastHQ.


