Best Throne and Liberty Healer Build – Wand/Tome and Longbow

Welcome to our Throne and Liberty Healer Build. With this Healer build, we will be using the combination of the Wand/Tome and Longbow weapons to protect, heal, and support our allies as much as possible. This weapon combination is great to increase the overall damage of the group!
For a full overview of all builds please visit the Throne and Liberty Builds Database.
The Healer Build is not only great at healing, but it also increases the damage of the group tremendously. Both Wand/Tome and Longbow have skills that can help the group increase their overall damage. I will also present you a farming setup that you can use to do dailies or public dungeons with so you don’t always have to rely on others.
Mainhand: Wand Tome
Offhand: Longbow
Table of Contents:
- How to build your Character [Important]
- Leveling Character
- Leveling Skills and Gear
- Healer Basics
- Skill Setups
- Attribute Stat Priority
- Gear Progression
- Guardians
- Buff Food & Potions
How to Build your Healer Character in Throne and Liberty

Playing Throne and Liberty can be overwhelming at first. In this section, I want to explain quickly how your character build progression works in this game. Leveling up to max level is easy and won’t take long, just follow the main story purple quests and you will hit max level at the end of the story. During this period the game teaches you how to craft gear, this will allow you to get full green gear fairly fast while also working on some basic blue items.
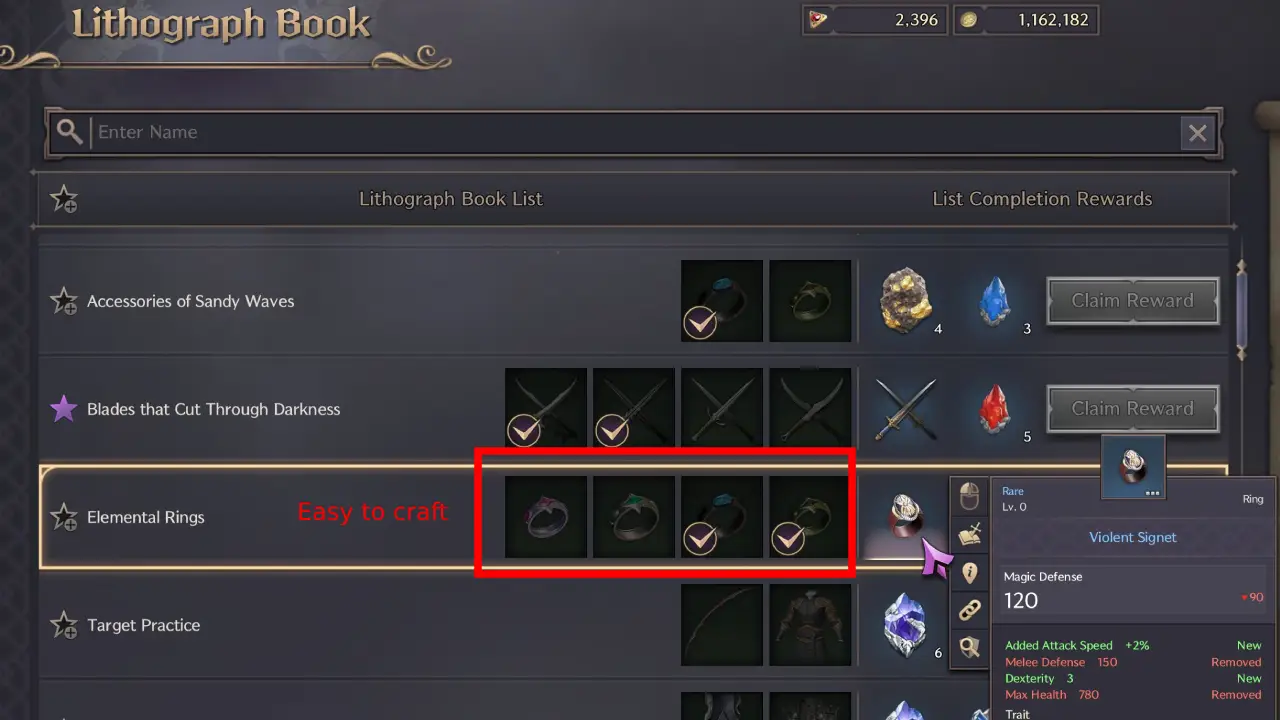
Now you are at max level and you want to get some easy wins with the Lithograph Book (Check Menu ingame). This allows you to sacrifice certain items and in return you get better items. So you can get slightly better blue gear.
Important: Now, this is where most players make a big mistake. They want to start going from blue to purple gear. But this is too early! The main strength of gear comes from attribute stats and traits. Fully traiting a purple item is impossible as a new player unless you slide your credit card. Therefore, you want to first get good blue gear with good attribute stats and good traits before you even consider going after purple gear.
It is best to either bank purple items you drop or sell them at the Auction House if they are worth a lot. You don’t sell items in this game, you sell the extract of it with the trait. Traits are the most important aspect of this game and is where most of your time commitment will be.
You always want to level up your blue gear too. You won’t lose any “mats” on this, because you can transfer the level and trait power of a blue item into a Purple item. So a level 9 blue item transferred into a purple will result in a level 6 purple item. And the blue traits will disappear but the purple item gets “trait blessing”. This basically makes it cheaper to get your purple item traited.
Once you have good blue gear, then you can think about starting to equip purple items! Finding a purple item isn’t necessarily difficult, but fully traiting and maxing it out definitely is!
- Leveling up is easy, follow purple main story quest to hit max level.
- While leveling, you get green items and a few blue items.
- After max level, focus on getting good blue gear.
- Don’t go purple items yet! (Rookie Mistake)
- Focus on getting good blue items to max level and fully traiting them
- After that, you can think about starting to equip purple items.
- Max level blue gear with full traits is better than non-maxed purple gear with no traits.
- Do your dailies, co-op dungeons, and public dungeons to get pouches and other loot.
This is more or less it about progressing your character. Even getting blue gear fully trained will already be a challenge. Getting purple items to max level is even more difficult and time consuming.
Once Again: A max-level blue weapon with full traits will do more damage than a max-level purple weapon without full traits in Throne and Liberty!
Leveling your Healer Build in Throne and Liberty
The leveling progression in Throne and Liberty is easy. Follow the main story quest (Purple Markers) and you will hit max level at the end of the story. During this phase, the game will also teach you how to craft gear to get all green gear with some blues at the end of the story.
During this process, you also want to get used to your skills. Make sure to read all the skills so you know what they do! Also, test the skills out on monsters or the target dummies you can find, for example, in Vienna Village.
Once you are max level you want to focus on getting good blues before you go purple gear. I explained this above in the How to build your Character section. Maxed out blue gear with full traits is stronger than max level purple gear without maxed out traits. Blue gear is also a lot easier to get obviously, see the Gear Progressions section of our Throne and Liberty Healer Build.
Leveling Skills and Gear in Throne and Liberty
While leveling up, you will get plenty of upgrade materials, but eventually, you will have a shortage of these. So here are a few important tricks to keep progressing as fast as possible with your character build in Throne and Liberty.
Skills Progression:
- Upgrade all skills from green to blue first
- Upgrade all skills from blue to purple next
- Dissolve purple growth materials to get 10x the amount of the lower quality. That means 1 purple growth material will get you 10 blue growth materials.
- Doing Exploration quests will give you plenty of upgrade materials.
- Purchasing the Leveling Pass and Battle Pass will also give you plenty of growth materials. You can sell items in Auction House to get Lucent without spending real money.
- Inside the store there is a section with Ornate coins where you can also purchase growth materials. Purchase the purple materials and dissolve them instead of buying blue materials directly (which is a lot more expensive).
- Ornate Coins are often received for maintenance downtime and other things like events.
Gear Progression:
- Green to Blue: A max level 6 green item infused into a blue item will become a level 3 blue.
- Blue to Purple: A max level 9 blue item infused into a purple item will become a level 6 purple.
- This was implemented so your materials aren’t “wasted.”
- Fully gear yourself with blue items and trait them before you consider going purple. (Takes weeks or months).
- Look out for good blue items that give attribute stat points that you need for your build.
- A max-level blue weapon with full traits will do more damage than a max-level purple weapon without full traits.
- Dissolve purple growth materials to get 10x the amount of the lower quality. That means 1 purple growth material will get you 10 blue growth materials.
- Doing Exploration quests will give you plenty of upgrade materials.
- Purchasing the Leveling Pass and Battle Pass will also give you plenty of growth materials. You can sell items in Auction House to get Lucent without spending real money.
- Inside the store there is a section with Ornate coins where you can also purchase growth materials. Purchase and dissolve the purple materials instead of buying blue materials directly (which is a lot more expensive).
- Ornate Coins are often received for maintenance downtime and other things like events.
Healer Basics in Throne and Liberty
Healing is a bit different in Throne and Liberty compared to other games. Most of the damage in this game is avoidable. You can block the attack where the purple circle appears, then you receive zero damage. Additionally, plenty of damage can be avoided.
However, especially newer players will very likely fail these two, so you still have to heal. If you are playing with an experienced team, you will notice that you barely have to heal at all, which means you can focus more on support and deal some damage, too!
- Experienced Team = Healer focuses on damage and support skills that increase damage.
- Newbie Team = Healer focuses more on healing and keeping players alive
Skill Setups for our Healer Build in Throne and Liberty
Now, let’s look at the skill setups for our Throne and Liberty Healer Build. The game allows you to save several setups, make sure you have one for Dungeons and one for Farming (Overland and Public Dungeons).
- Dungeon: More focused on healing and support with a bit of damage
- Farming: More focused on AoE damage and a bit of healing
For both setups on our Throne and Liberty Healer Build we want to select the Chaotic Shield to decrease our cooldowns and for some additional healing.
Dungeons
The Dungeon setup for our Throne and Liberty Healer Build can do plenty of things. We can obviously heal, increase our groups damage and deal damage ourselves.
Skill Changes via Skill Specialization:
| Icon | Skill Name | Skill Spec |
|---|---|---|
 |
Zephyr’s Nock | Damage Increase, Cooldown |
 |
Strafing | Gale, Consecutive Use |
 |
Brutal Arrow | Gale Area |
 |
Touch of Despair | Effect Duration up |
 |
Decaying Touch (Base: Corrupted Magic Circle) |
Decaying Touch |
 |
Curse Explosion | Dark Explosion, Damage Increased, Focus Target |
 |
Deadly Marker | Bullseye |
 |
Nature’s Blessing | Empty |
 |
Time for Punishment | Effect Duration up |
 |
Fountain of Life | Mana Recovery, Radius Increased |
 |
Clay’s Salvation | Radius Increased |
 |
Swift Healing | Healing Transfer, Skill Dinstance Increased |

Healing Skills:
- Fountain of Life: Big healing circle, also restores magicka to group members that stand in it.
- Clay’s Salvation: Big burst healing circle
- Swift Healing: Quick single target heal, can be used twice in a row if needed
- Nature’s Blessing: Increases Health and Mana regen of the group.
Support Skills:
- Deadly Marker: Each time a group member critical hits, reduces cooldown of all party members by 1%. All Longbow users should use this, it stacks up to 100 times!
- Time for Punishment: Decreases the target’s Skill Damage Resistance.
Damage Skills:
- Zephyr’s Knock: Use this after Strafing, Deals single target damage. Increased damage on Bullseye stacks.
- Strafing: Deals single target damage, applies Bullseye stacks.
- Brutal Arrow: AoE damage and also applies Gale effect to enemies (extra explosion damage)
- Touch of Despair: Deals damage over time and applies Weaken: Curse.
- Curse Explosion: Great damage and doesn’t remove Weaken: Curse.
- Decaying Touch: Single target damage over time.
Bossing Passives
| Icon | Name |
|---|---|
 |
Devotion and Emptiness |
 |
Wraith’s Beckon |
 |
Vampiric Contract |
 |
Noble Revival |
 |
Selfless Soul |
 |
Rapidfire Stance |
 |
Sniper’s Sense |
 |
Roxie’s Arrowhead |
Farming/ Mobbing
The Farming setup for our Healer build in Throne and Liberty has fewer heals but way more damage potential to easily complete dailies or public dungeons.
Skill Changes via Skill Specialization:
| Icon | Skill Name | Skill Spec |
|---|---|---|
 |
Zephyr’s Nock | Damage Increase |
 |
Decisive Sniping | Charging Time, Mobility, Decisive Bombardment |
 |
Brutal Arrow | Gale Area, Radius Increased |
 |
Touch of Despair | Effect Duration up |
 |
Corrupted Magic Circle | Rotten Swamp |
 |
Curse Explosion | Dark Explosion |
 |
Ray of Disaster | Targets Expanded |
 |
Blitz | Empty |
 |
Tornado (Base: Arrow Vortex) |
Tornado |
 |
Fountain of Life | Mana Recovery |
 |
Flash Wave (Base: Flash Arrow) |
Flash Wave, Range Widened |
 |
Swift Healing | Consecutive Use, Mana Recovery |

Healing Skills:
For farming, we use a lot less healing skills. If you struggle to stay alive because of a low gear score, then I recommend equipping Invincible Wall, which grants you a big shield. Additionally, if you go farm in a Public Dungeon with a group make sure to slot Clay’s Salvation.
- Fountain of Life: Big healing circle, also restores magicka.
- Swift Healing: Quick single target heal, can be used twice in a row if needed
- Invincible Wall: Replace Ray of Disaster if you need a shield to stay alive easier.
Support Skills:
- Blitz: With Blitz you can immediately reactivate Flash Wave or Decisive Sniping again for maximum damage.
Damage Skills:
- Zephyr’s Knock: This is single target and only used to kill off the last enemy.
- Decisive Sniping: Hard hitting AoE abilities that shoots forward. Charge it to maximum for max damage.
- Brutal Arrow: AoE damage and also applies Gale effect to enemies (extra explosion damage)
- Tornado: Deals good damage and lifts enemies up, this way you take less damage and can charge another skill already.
- Flash Wave: Crazy big AoE that deals good damage and also restores health for you.
- Touch of Despair: Deals damage over time and applies Weaken: Curse.
- Corrupted Magic Circle: Deals AoE damage over time.
- Curse Explosion: Great damage and doesn’t remove Weaken: Curse.
Mobbing Passives
The mobbing passives are essentially the same as Bossing, except the last passive has changed. Now, we use Morale Boost, which lowers the cooldown of our skills when we collide with enemies.
| Icon | Name |
|---|---|
 |
Robust Constitution |
 |
Vital Force |
 |
Indomitable Armor |
 |
Resilient Mind |
 |
Spectrum of Agony |
 |
Aegis Shield |
 |
Impenetrable |
 |
Morale Boost |
Skill Upgrade Priority
Progressing your skills in Throne and Liberty takes time. Therefore, it is important to first get all your used skills from green quality to blue quality. Green to blue is achieved fairly easily. After that, start going from blue to purple.
Tip: At the beginning, it makes sense to dissolve purple upgrade materials. Because 1 purple material will give you 10 blue materials. This way you can progress the blue quality faster. You could dissolve this even further, so technically, 1 purple upgrade material results in 100 green upgrade materials. Of course you can also craft some books, but dissolving is far more efficient than anything else.
Dissolve Upgrade Mats: 1 Purple > 10 Blue > 100 Green
IMPORTANT: Don’t dissolve OMNIPOTENT books (Purple growth books, says in the text on the book). These are special and can only be used for your special level 50 skills.
So that leaves us with a priority list for our Throne and Liberty Healer Build related to how to progress skills.
- Priority 1: Get all used skills from green to blue (if necessary, dissolve purple growth materials into blue and then into green like explained above.
- Priority 2: Get all skills from blue level 1 to purple level 1. This takes a bit more time. (Once again, dissolve purple growth materials into blue to get plenty of blue books.
- Priority 3: Purple skill progression to level 5: Blitz > Chaotic Shield > now order doesn’t matter, pick whatever you like the most next.
The reason we want to push as many skills to purple as possible, is because they often gain a new effect when going to a higher quality. Therefore, we want to achieve this quickly with as many skills. Afterward, from purple level 1 to max purple, there are only small differences.
Time estimate: Going from green to blue can be achieved after the end of the story + a few exploration quests. Going from blue to purple is a lot more tricky and might take 1-2 months. Going from purple level 1 to max purple will take months but isn’t that important since you only gain small extra stat boosts.
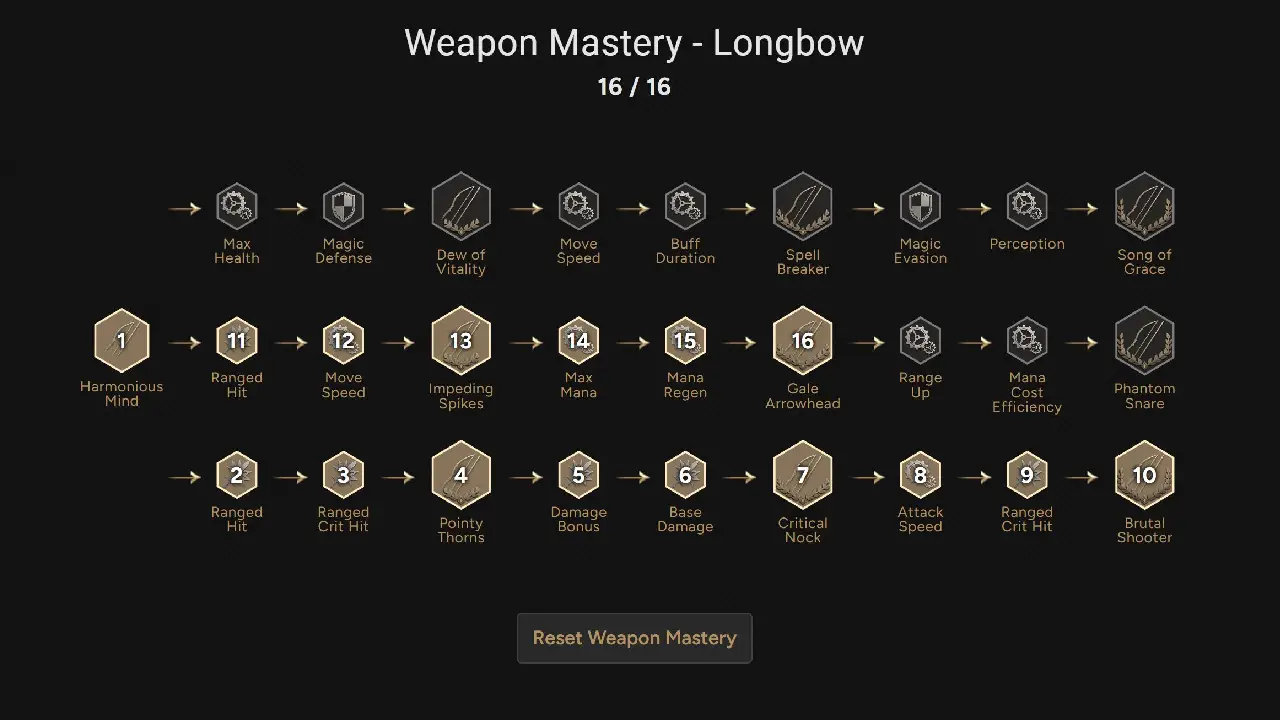
Weapon Mastery
The Weapon Mastery stays the same for all our Throne and Liberty Healer Setups. For both specs, we are going to use damage and cooldown reduction perks.
Leveling up the Weapon Mastery to max 16 points takes a long time. You should be able to get to 8/9/10 fairly fast, but afterward, it starts dragging.

Attribute Stat Priority for our Healer Build
Our Throne and Liberty Healer Build needs a bit a mix of everything stat wise. While changing gear, always make sure to get to either 30/40/50/60 or 70 points, because you gain special bonuses for hitting these numbers.
At the beginning, you won’t have many stats, but once you get decent blue gear you will notice that stats can go very high and this will increase your combat power tremendously.
You should mostly focus on Dexterity and Wisdom because these are your main stats to increase overall healing and damage. However, especially at the beginning it can make sense to invest some stats into Strength. Because Strength also increases your health. Later on, you will have gear traits that increase your health, so you won’t have to invest much into Strength. But if you are new, it can make sense to place points there up to 30 points.
Primary Stat Points:
- Dexterity
- Wisdom
Secondary Stat Points:
- Strength
- Perception
Gear Progression for our Throne and Liberty Healer Build
The most difficult part of any build is the gear progression. This is where you will spend most of your time. With this Throne and Liberty Healer Build we will have three different setups, Early Game, Mid Game and Endgame. It is important to understand that any gear is placeholder gear until the endgame setup. However, getting the End Game setup is no easy task because the items all drop in different parts of the game.
Important: Fully leveled blue gear with max traits is stronger than fully leveled purple gear with no traits. I mentioned this above in the Leveling Skills and Gear section.
That means it is best to focus on getting good blue items that give you extra stats (mid-game). After you have all that, you want to start farming for the end-game gear. Getting purple items is often not even the problem, but traiting them is insanely expensive, especially for meta gear.
You will find three different setups below:
- Early Game Setup: Easy to get gear from your Lithograph Book
- Mid Game Setup: Co-Op Dungeon and Public Dungeon Gear
- End Game Setup: Co-Op Dungeon and World Boss Gear
Early Game Setup
The Early Game setup for the Throne and Liberty Healer Build can be obtained very faster after you start doing your dailies. It is important to understand that it doesn’t matter if you don’t have all the pieces. Generally, aim to get as many blue items as possible here fast. I call this “quick wins” because it is easy to get these blue items since most come from the Lithograph Book in Throne and Liberty.
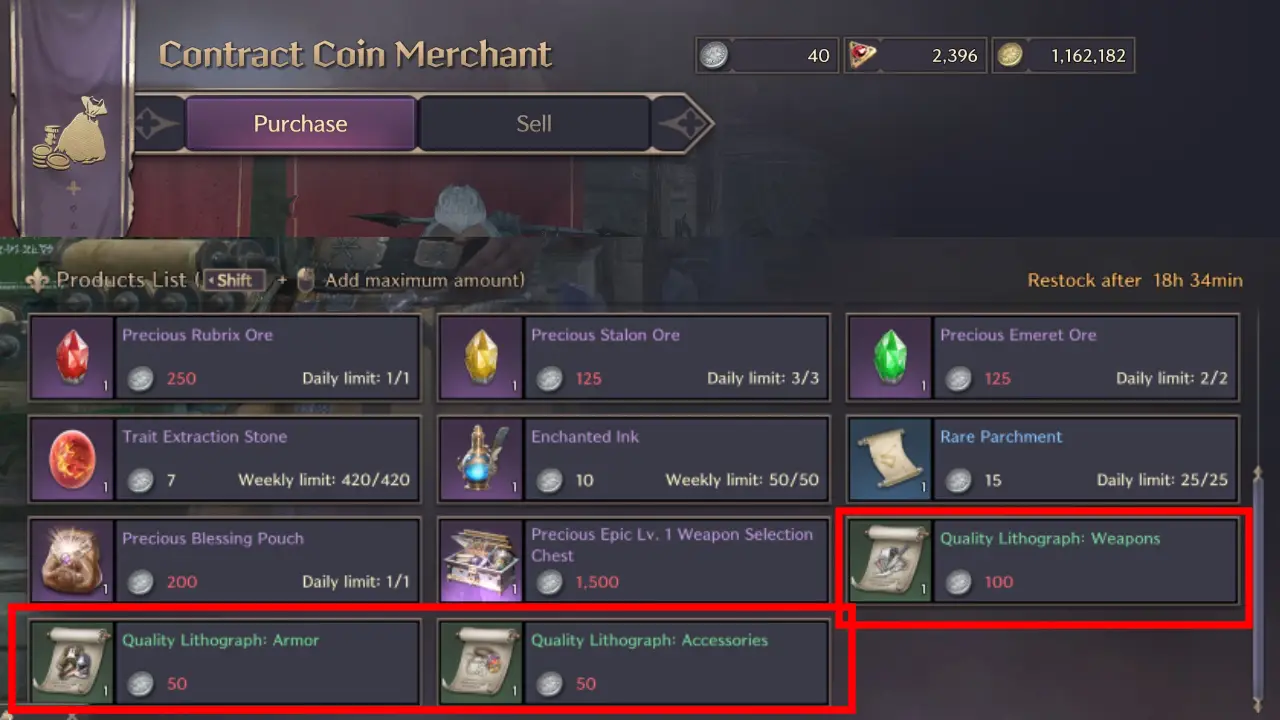
IMPORTANT: By doing your dailies you get Contract Coins (Always do them in high level areas for max gains). With the Contract Coins, you can buy Quality Lithographs: Weapons, Accessories, and Armor. These can be used to craft green items you put into your Lithograph Book to get blue items. This is how you get your first blue items easily!
LB = Lithograph Book
Every time you have enough materials to craft an item, immediately go for it.
| Icon | Type | Item | Drop Location |
|---|---|---|---|
 |
Main Hand | Scepter of the Resistance | LB Mystical Wands |
 |
Off Hand | Longbow of the Resistance | LB Long Ranged Nuisance |
 |
Head | Hood of the Resistance | LB Studious Hats |
 |
Cloak | Deadeye’s Cloak | LB Cloak of Victory |
 |
Chest | Robes of the Resistance | LB Industrious Wizards Collection |
 |
Gloves | Gloves of the Resistance | LB Watch the Hands of Judgement |
 |
Pants | Pants of the Resistance | LB Leggings of Mana |
 |
Boots | Shoes of the Resistance | LB Trailblazer Shoes |
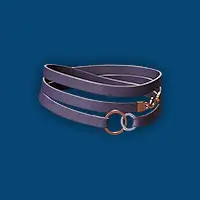 |
Necklace | Guardian Torque | LB Elemental Necklaces |
 |
Bracelet | Kunzite Bangle | LB Elemental Bracelets |
 |
Ring | Violent Signet | LB Elemental Rings |
 |
Ring | Ring of Robustness | Craftable (Green) |
 |
Belt | Belt of Midnight Hunt | LB Belt’s of Inner Strength |
Mid Game Setup
The Mid Game setup for our Throne and Liberty Healer Build is where you will spend most of your time because it is incredibly hard to get End Game equipment.
Don’t grind just one dungeon for loot! This is the number one mistake of getting gear from Co-Op Dungeons. There is a mathematically faster way to get gear from dungeons.
- In Stonegard there are purple item crafters (Map).
- Check all of them and read carefully what you need to craft items (Also check the Treasure Chests!)
- To craft purple dungeon weapons you need 2 Dimensional Essence: Salvation
- For each Dungeon completion, you get 4 Dimensional Soul Shards when you open a chest at the end.
- That means, if you run each dungeon 5 times you can craft the weapon of your choice.
- Purple Jewelry can be obtained via Chests from the Accessories Crafter in Stonegard too (Map).
RANDOM QUEUE: If you use the random queue system, you also have a small chance to get a Dimensional Essence: Salvation.
It is mathematically faster to rotate dungeons and then simply craft the purple item of your choice rather than getting a lucky drop at 2-5% drop chance.
Auction House: Check the Auction house for blue item lithographs. Sometimes, they can be cheap, so you can buy them and craft the item directly.
That means getting the items below is mostly farming Co-Op Dungeons and doing Public Dungeons to get enough currency to craft the purple items. Blue item drop chances are mostly fine in dungeons so you should be able to get them eventually. But focus on the purple items!
| Icon | Type | Item | Drop Location |
|---|---|---|---|
 |
Main Hand | Lequirus’s Coveted Tome | Co-Op Cave of Destruction, Craftable |
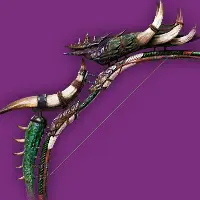 |
Off Hand | Toublek’s Deathmark Longbow | Co-Op Tyrant’s Isle, Craftable |
 |
Head | Elusive Hexweaver Hat | Worker Ant in Ant Nest Public Dungeon |
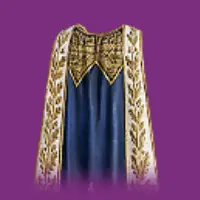 |
Cloak | Supreme Devotion | Co-Op Cave of Destruction Lequirius’s Equipment Selection Chest |
 |
Chest | Robes of the Resistance | LB Industrious Wizards Collection |
 |
Gloves | Ascended Guardian Gloves | Co-Op Butcher’s Canyon |
 |
Pants | Duskblood Trousers | Dark Wizard in Shadowed Crypt |
 |
Boots | Alacritous Invoker Shoes | Charging Ant in Ant Nest Public Dungeon |
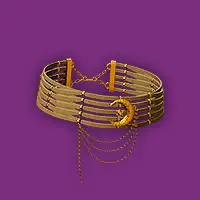 |
Necklace | Clasp of the Conqueror | Precious Epic Equipment Chest: Abyss |
 |
Bracelet | Ancient Saurodoma Bracers | Co-Op Tyrant’s Isle Toublek’s Equipment Selection Chest |
 |
Ring | Etched Alabaster Band | Precious Epic Equipment Chest: Abyss |
 |
Ring | Amber Dimensional Band | Precious Epic Accessory Selection Chest |
 |
Belt | Belt of Midnight Hunt | LB Belt’s of Inner Strength |
Best in slot traits:
- Lequirius’s Coveted Tome: Buff Duration, Heavy Attack Chance, Hit Chance
- Toublek’s Deathmark Longbow: Mana Cost Efficiency, Heavy Attack Chance, Hit Chance
- Supreme Devotion: Skill Damage Resistance, Debuff Duration, Mana Regen
- Ascended Guardian Gloves: Attack Speed, Max Mana
- Clasp of the Conqueror: Max Health, Buff Duration, Skill Damage Boost
- Ancient Saurodoma Bracers: Skill Damage Resistance, Debuff Duration
- Etched Alabaster Band: Max Health, Buff Duration, Skill Damage Boost
- Amber Dimensional Band: Max Health, Buff Duration, Skill Damage Boost
For the blue gear it doesn’t matter that much because it will be replaced, but if you can go with Max Health traits.
End Game Setup
The End Game Setup for the Throne and Liberty Healer Build is the best in slot setup that you want to aim for. This will take a long time to achieve. You might be able to get the items needed in a decent time, but traiting them is incredibly time consuming.
Getting World Boss loot is very difficult unless you have a good guild that splits up the loot. If you aren’t in a guild it is very unlikely that you will manage to get any endgame gear unless you buy most of it via the Auction House.
Our goal is to get 2 items of the Transcended One and 2 items of Mother Nature.
- 2 Piece Bonus: 7.5% Cooldown Speed
- 2 Piece Bonus: 7.5 Weaken Duration
| Icon | Type | Item | Drop Location |
|---|---|---|---|
 |
Main Hand | Lequirus’s Coveted Tome | Co-Op Cave of Destruction, Craftable |
 |
Off Hand | Toublek’s Deathmark Longbow | Co-Op Tyrant’s Isle, Craftable |
 |
Head | Swirling Essence Hat | Precious Epic Equipment Chest: Abyss |
 |
Cloak | Supreme Devotion | Co-Op Cave of Destruction Lequirius’s Equipment Selection Chest |
 |
Chest | Divine Justicar Attire | Cornelius World Boss |
 |
Gloves | Ascended Guardian Gloves | Co-Op Butcher’s Canyon |
 |
Pants | Swirling Essence Pants | Ahzreil World Boss |
 |
Boots | Ascended Guardian Shoes | Demonhoof Head Shaman Syleus Abyss |
 |
Necklace | Clasp of the Conqueror | Precious Epic Equipment Chest: Abyss |
 |
Bracelet | Ancient Saurodoma Bracers | Co-Op Tyrant’s Isle Toublek’s Equipment Selection Chest |
 |
Ring | Etched Alabaster Band | Precious Epic Equipment Chest: Abyss |
 |
Ring | Amber Dimensional Band | Precious Epic Accessory Selection Chest |
 |
Belt | Girdle of Spectral Skulls | Adentus World Boss |
Best in slot traits:
- Lequirius’s Coveted Tome: Buff Duration, Heavy Attack Chance, Hit Chance
- Toublek’s Deathmark Longbow: Mana Cost Efficiency, Heavy Attack Chance, Hit Chance
- Swirling Essence Hat: Max Health, Cooldown Speed
- Supreme Devotion: Skill Damage Resistance, Debuff Duration, Mana Regen
- Divine Justicar Attire: Max Mana, Mana Regen
- Ascended Guardian Gloves: Attack Speed, Max Mana
- Swirling Essence Pants: Max Health, Debuff Duration
- Ascended Guardian Shoes: Max Mana, Mana Regen
- Clasp of the Conqueror: Max Health, Buff Duration, Skill Damage Boost
- Ancient Saurodoma Bracers: Skill Damage Resistance, Debuff Duration
- Etched Alabaster Band: Max Health, Buff Duration, Skill Damage Boost
- Amber Dimensional Band: Max Health, Buff Duration, Skill Damage Boost
Guardians for your Healer Build in Throne and Liberty
Guardians are special transformations that have a 10 minute cooldown. They have various effects; for our Healer build, the only viable Guardian is Lady Knight Kamarshea. Creates a shield for 50% of the user’s Max Mana. Cooldown Speed increases by 40% while the Shield is up. The summon ends when the Shield is removed.
Lady Knight Kamarshea is acquired in the Manawastes from the Demon’s Test in Throne and Liberty.
All Guardians: Throne and Liberty Guardians List

Buff Food & Potions
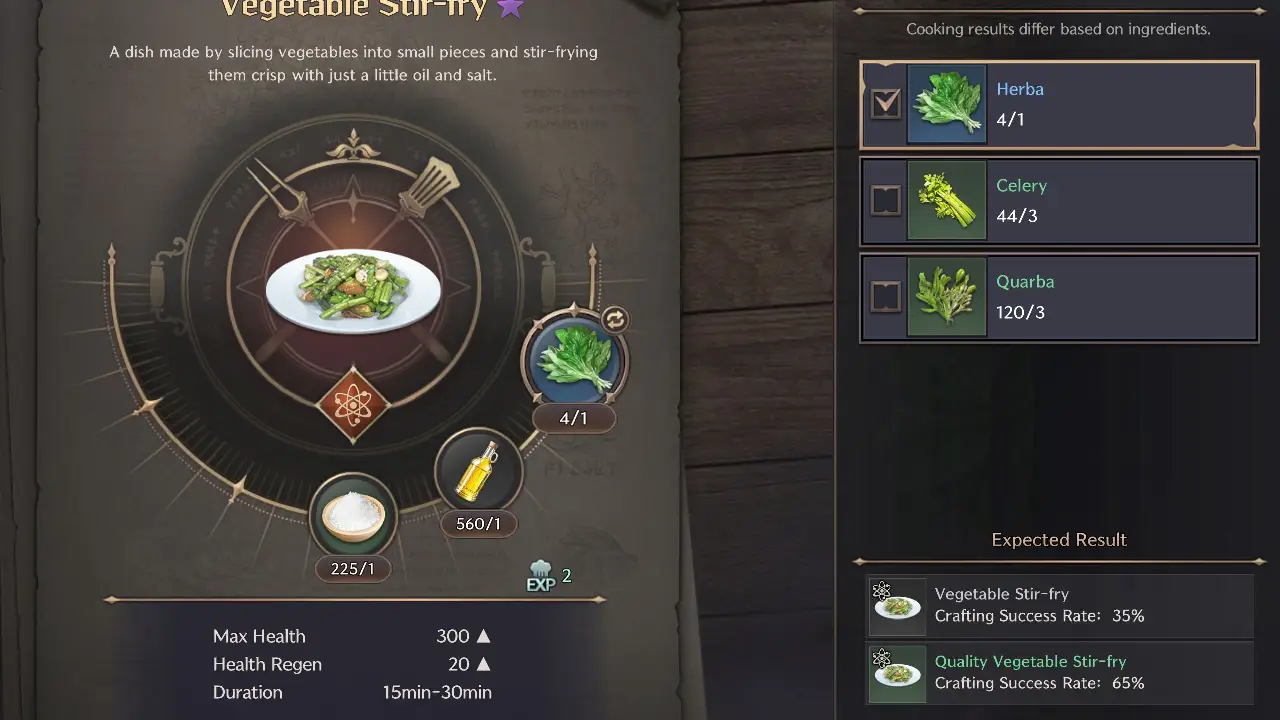
Buff Food and Potions are an important part of any Throne and Liberty Build. It is recommended to level up cooking because some of the later buff foods are very strong. However, for most content right now Vegetable Stir-fry will do. It increases your Max Health and Health Regen for 15-30 minutes.
Fried Egg is also a good option if you want to deal some extra damage on bosses.
Related Guides:
The post Best Throne and Liberty Healer Build – Wand/Tome and Longbow appeared first on AlcastHQ.


