
Best BG3 Sword Bard Build Guide – College of Swords

Welcome to the Best BG3 Swords Bard Build. We are using the College of Swords subclass for this build. The Bard class is a spellcaster who specialises in supporting allies and confusing or debuffing enemies, but can also make for a formidable fighter by themselves. The Bard’s most important attribute is Charisma.
Please visit our Best BG3 Builds overview page for more builds or check out our Best BG3 Bard Build with the College of Lore subclass. To get an overview of all classes please visit the BG3 Classes overview page.
Bards can use the Bardic Inspiration ability to improve the odds of their allies in combat, helping them with Attack Rolls, Ability Checks or Saving Throws. Bards are both great support characters and amazing spell casters. As the name of the subclass suggests, College of Swords Bards place greater emphasis on martial attacks – however they still retain a strong spellcasting ability similar to that of other bards. The BG3 College of Swords Build was last updated in September 2025. It works for both PC and Console (PS5 and Xbox Series X/S).
Table of Contents:
- Introduction to the Swords Bard Build
- Character Creation
- Swords Bard Build Levelling Progression
- Swords Bard Equipment
- Swords Bard Build Extra Info, Tips & Tricks
Sword Bard Strengths
Sword Bard Weaknesses
BG3 Sword Bard Build Overview
We’ll begin with a quick summary of the Bard class and College of Swords subclass, which we’ll be using for this build. If you’re already familiar with how they work, please skip this section.
Bard Summary
Bards are highly versatile fighters, capable of fighting with a variety of weapons and casting powerful spells. They are also great at inspiring their allies and can master more Skills than any other class. These features make the Bard a “jack of all trades” and a great support character.
To begin with, you get the ![]() Bardic Inspiration class action with which you can inspire allies with and add 1d6 bonus to their next Attack Roll, Ability Check or Saving Throw. This lasts until your next Long Rest and can be applied to all group members. To cast this, you need a Bardic Inspiration Charge, a Bard class resource that can be replenished after a Long Rest. At level one, you will have access to two charges. You can also use
Bardic Inspiration class action with which you can inspire allies with and add 1d6 bonus to their next Attack Roll, Ability Check or Saving Throw. This lasts until your next Long Rest and can be applied to all group members. To cast this, you need a Bardic Inspiration Charge, a Bard class resource that can be replenished after a Long Rest. At level one, you will have access to two charges. You can also use ![]() Perform on the Bard to play a song and attract NPCs to you.
Perform on the Bard to play a song and attract NPCs to you.
![]() Song of Rest is obtained at level 2 and can be used to revitalise the group with the same effect as a Short Rest.
Song of Rest is obtained at level 2 and can be used to revitalise the group with the same effect as a Short Rest.
Later at level 5, you gain ![]() Improved Bardic Inspiration, boosting your
Improved Bardic Inspiration, boosting your ![]() Bardic Inspiration class action to 1d8 instead of 1d6 bonus. You also get the
Bardic Inspiration class action to 1d8 instead of 1d6 bonus. You also get the ![]() Font of Inspiration passive feature, allowing you to regain all your Bardic Inspiration after a Long or Short Rest. At level 6, you gain
Font of Inspiration passive feature, allowing you to regain all your Bardic Inspiration after a Long or Short Rest. At level 6, you gain ![]() Countercharm, which gives you and allies within 9m
Countercharm, which gives you and allies within 9m ![]() Advantage on
Advantage on ![]() Saving Throws against being
Saving Throws against being ![]() Charmed or
Charmed or ![]() Frightened. This will summon a magical music instrument at your place of choice for 3 turns.
Frightened. This will summon a magical music instrument at your place of choice for 3 turns.
At level 10, you once again gain ![]() Improved Bardic Inspiration, boosting your
Improved Bardic Inspiration, boosting your ![]() Bardic Inspiration class action to a 1d10 instead of a 1d8 bonus. Additionally, you get the
Bardic Inspiration class action to a 1d10 instead of a 1d8 bonus. Additionally, you get the ![]() Magical Secrets passive that allows you to pick two non-Bard spells up to level 5. (Note: We also get this from our subclass already at level 6, so we get to select 4 non-Bard spells in total). It is highly recommended to pick the
Magical Secrets passive that allows you to pick two non-Bard spells up to level 5. (Note: We also get this from our subclass already at level 6, so we get to select 4 non-Bard spells in total). It is highly recommended to pick the ![]() Cone of Cold spells, which deal insane AoE damage.
Cone of Cold spells, which deal insane AoE damage.
College of Swords Summary
The College of Swords Bard subclass is better at fighting with weapons, gaining extra weapon and armour proficiencies. They can spend their Bardic Inspiration Charges on special weapon actions to gain an edge in combat.
- Proficiency with
 Medium Armour and
  Scimitars (Level 3)
 - Blade Flourish (Level 3) – You gain access to three unique weapon actions (each one has both a melee and ranged version)
 Defensive Flourish – Boost your
  Armour Class by 4 if you hit the target
 Slashing Flourish – Attack two enemies at once
 Mobile Flourish – Knock your target back by 6m. You can teleport to the target after knocking them back.
 Duelling Fighting Style (Level 3) – When wielding a one-handed weapon with an empty off-hand, your weapon deals 2 additional damage per hit.
 Extra Attack (Level 6) – Each
  Action now yields two weapon attacks.

Character Creation (Level 1) BG3 College of Swords Bard Build
In this section, we will guide you through the best options in Character Creation for the Baldur’s Gate 3 College of Swords Bard Build. While you can deviate somewhat from this if you want, following these steps will result in the most powerful starting point for your Bard Build.
Top 5 Races for the College of Swords Bard
This build will work fine with any race in the game, but there are some fairly minor differences between the races that are worth paying heed to. Below are the best five races for the College of Swords Bard in Baldur’s Gate 3:
| Race | Strengths | Info |
|---|---|---|
Wood Elf |
|
The Wood Elf enjoys a 1.5 metre bonus to their Movement Speed, which is already a big deal that can provide you with a lot of value.
Your extra Skill and Weapon Proficiencies are very handy, and immunity to magical Sleep is particuarly useful in the early-game, when enemy spellcasters love to spam the Sleep spell. Wood Half-Elf provides some of the same benefits. |
Duergar |
|
With their wider choice of armour and weapon proficiencies, and resistances to poison, charm, and paralysis, Duergar are one of the strongest races in BG3.
The only downside of Duergar is their small stature – this reduces their base Movement Speed to 7.5 metres per turn (most races get 9 metres). |
Drow, Any |
|
The Drow have many similar bonuses to the Wood Elves, but with even better Darkvision and innate access fo Faerie Fire, an excellent debuff spell.
They lack the extra Movement Speed of Wood Elves, however. |
|
Dragonborn, Any |
|
Dragonborns don’t excel in any regard, but their elemental resistance and breath attack are quite useful.
If you want to choose a Dragonborn type that will give you resistance to the most enemy attacks possible, choose one of the Fire or Poison variants. |
|
Human |
|
Humans are useful for their unrestricted Skill choice. Used wisely, this allows your character to be proficient with a useful Skill that wouldn’t normally be available for your Class. |
Skills & Background
Unlike other classes, the Bard has no restrictions when choosing their Proficient Skills. They can also choose three of these by default, instead of two. This increases to four if you chose Human.
We’ll be building with high Charisma and Dexterity, so it’s a good idea to select a Background and Skills that match this profile.
I suggest using the Entertainer Background, which gives you the following Skill Proficiencies:
 Acrobatics (DEX) – Helps your character to resist being pushed around by enemies.
 Performance (CHA) – You can sometimes pass Performance checks in combat to impress NPCs, which can unlock extra options.
For your manual Skill Picks, I recommend the following choices:
 Deception (CHA) – Used in dialogue to trick NPCs into doing what you want.
 Intimidation (CHA) – Used in dialogue to scare NPCs into doing what you want. It can prevent fights from breaking out, but if you fail, it is more likely to antagonise potential enemies.
 Persuasion (CHA) – Used to sweet-talk NPCs into going along with your wishes.
 Sleight of Hand (DEX) – If you chose Human and have an extra Skill pick, go with Sleight of Hand. This will help you with Lockpicking and Pickpocketing.
Abilities
As a Bard, our most important ability is Charisma, which is used to determine the effectiveness of our spellcasting. Other important abilities are Dexterity, which boosts our Armour Class, and Constitution, which increases our Hitpoints and improves our Concentration Checks.
As such, we recommend going for an Ability distribution that looks something like:
 10 Strength
 16 Dexterity
 14 Constitution
 8 Intelligence
 10 Wisdom
 16 Charisma
Bold Abilities are essential for the build. The others can be tweaked, if you want.

Spells
To start with, you’ll need to select four first level Spells for your character to learn. We recommend going with the following options:
 Healing Word – This is a basic healing spell that consumes a
  Bonus Action rather than a regular one, allowing you to heal and attack or cast another spell on the same turn. It can also be used at long-range rather than being melee-only. The maximum healing roll on this spell is a little lower than Cure Wounds, but that spell has a much lower range and costs a full Action, so it’s almost always better to use Healing Word.
 Thunderwave – When you cast Thunderwave, your character casts a large linear AOE that knocks back anyone and anything in its path, damaging them too for good measure. Not only is this a decent AOE damage spell, it’s also very practical in combat, allowing you to create space or to knock enemies off ledges or cliffs for extra falling damage. Just be careful not to hit your friends, as the AOE is quite wide.
 Dissonant Whispers – This deals some
  Psychic Damage to the targeted enemy, and also makes them
  Frightened (unless they perform a Wisdom
  Saving Throw). Frightened enemies have a
  Disadvantage on ability checks and attack rolls, and cannot willingly move closer to the source of their fear (the caster). Targets remain Frightened for two turns. This is a great spell for locking down annoying or dangerous enemies.
 Tasha’s Hideous Laughter – Another great spell for locking down enemies. This causes the enemy to be overcome with fits of laughter, making them fall prone and unable to get up. The caster can maintain this effect for up to 10 turns, as long as they can maintain Concentration. Also, the target will try to shake off the effect at the end of their turn, and every time they take damage.
Cantrips
In addition to the Spells, you’ll need to choose two Cantrips. These are less powerful spells that do not consume a Spell Slot when cast, meaning you can generally cast them every turn if you want to with no limitations. We recommend choosing the following Cantrips for your Bard build:
 Vicious Mockery – This deals a small amount of Psychic Damage to the enemy targeted, and also gives them a Disadvantage on their next
  Attack Roll. This is a handy debuff spell that can be used to lessen the danger of troublesome enemies.
 Light – This is a basic spell that lets you infuse an object or ally with light. It’s useful for navigating and fighting in dark places, and this spell doesn’t need Concentration, so it won’t mess with our other Concentration Spells, which is why we chose this instead of other more powerful light cantrips.
Starting Instrument
You can also select a starting instrument. You can pick whatever you want here. It has no effect besides changing the type of music your Bard plays when casting spells, and can be changed later by equipping other instruments.
Levelling Progression for the College of Swords Bard Build
Now, let us take a look at the levelling progression for the College of Swords Bard Build in Baldur’s Gate 3.
Early-Game Levelling Progression
We will start with levels 2-4.
Level 2 – Spells
At Level 2, the BG3 Bard Build unlocks a couple of its class abilities.
Firstly, we get the ![]() Jack of All Trades passive, which gives us half of our proficiency bonus (rounded down) in any Ability Checks that we’re not proficient with. This is particularly useful for out-of-combat encounters, slightly increasing our odds of increasing even in disciplines that we haven’t built around.
Jack of All Trades passive, which gives us half of our proficiency bonus (rounded down) in any Ability Checks that we’re not proficient with. This is particularly useful for out-of-combat encounters, slightly increasing our odds of increasing even in disciplines that we haven’t built around.
Secondly, we unlock the ![]() Song of Rest ability. This can be used both inside and outside of combat, and revitalises your party as though you took a Short Rest.
Song of Rest ability. This can be used both inside and outside of combat, and revitalises your party as though you took a Short Rest.
Finally, you’ll be able to choose one more Spell to learn. Depending on what spells you already have in your party, we recommend choosing either ![]() Faerie Fire or
Faerie Fire or ![]() Bane, both useful debuff spells that can affect multiple creatures at once. Faerie Fire gives your allies an advantage when attacking the enemies, while Bane gives the enemies disadvantage when attacking you. If you already have them both on another character in your party, then try to go for another useful debuff spell, such as
Bane, both useful debuff spells that can affect multiple creatures at once. Faerie Fire gives your allies an advantage when attacking the enemies, while Bane gives the enemies disadvantage when attacking you. If you already have them both on another character in your party, then try to go for another useful debuff spell, such as ![]() Sleep.
Sleep.

Level 3 – Subclass and Spells
When you reach Level 3, you’ll need to choose your subclass. For this Bard build, we are using the College of Swords, which immediately gives us a whole bunch of benefits, listed below:
- Gain 3 new Blade Flourish abilities – these attacks cost 1 Bardic Inspiration Charge if they hit their target, deal your normal weapon damage plus an extra 1d6 bonus damage, and each one has a melee and ranged version:
- Defensive Flourish – Boost your Armour Class by 4 if you hit the target
- Slashing Flourish – Attack two enemies at once
- Mobile Flourish – Knock your target back by 6m. You can teleport to the target after knocking them back.
- Gain Proficiency with Medium Armour and Scimitars
- Choose one of two Fighting Styles:
- Duelling – When wielding a one-handed weapon with an empty off-hand, your weapon deals 2 additional damage per hit.
 Two-Weapon Fighting – When you make an attack with your off-hand weapon, you add your Ability Score Modifier to the damage of the attack
Of the two options, Duelling will work best with the weapons we’re using in this build; however, if you want to deviate slightly from this guide and make a dual-wielding Bard, then that option will still work really well.
Finally, you will have to choose another new spell. At this point, we’re able to include some second-level spells. We recommend going with ![]() Cloud of Daggers. This creates a small AOE that does pretty high damage each turn, but requires concentration to maintain. It’s especially useful in chokepoints or on a group of enemies who are immobilised or stuck in a small space for any other reason. The spell also hits allies, so be careful when placing it.
Cloud of Daggers. This creates a small AOE that does pretty high damage each turn, but requires concentration to maintain. It’s especially useful in chokepoints or on a group of enemies who are immobilised or stuck in a small space for any other reason. The spell also hits allies, so be careful when placing it.
Level 4 – Feat, Spell and Cantrip
All characters in Baldur’s Gate 3 need to choose a Feat when they reach Level 4. These provide an extra buff or ability for your character and are great for further customising your build. It’s recommended to choose Ability Improvement, which will give you 2 more ability points to spend. Put both of these points into Charisma, which will take your Charisma score to 18. Boosting your Charisma will improve your Spellcasting and help you to keep up with the tougher enemies you’ll encounter as you reach higher-level parts of the map.
Next up, we need to choose another spell for the Swords Bard. We recommend choosing ![]() Enhance Ability, a very strong support spell that gives
Enhance Ability, a very strong support spell that gives ![]() Advantage on all checks related to a selected Ability, for the spell’s duration. Advantage means that instead of 1 die, we roll 2 dice and automatically choose the one with the best roll. This spell is awesome in combat when cast on a damage-dealer in your party, and can also be very helpful to pass high-DC dialogue checks. Once cast, the spell lasts until your Concentration is broken, so try to keep your Bard away from enemy attacks as much as possible. Also, casting another Concentration spell, like
Advantage on all checks related to a selected Ability, for the spell’s duration. Advantage means that instead of 1 die, we roll 2 dice and automatically choose the one with the best roll. This spell is awesome in combat when cast on a damage-dealer in your party, and can also be very helpful to pass high-DC dialogue checks. Once cast, the spell lasts until your Concentration is broken, so try to keep your Bard away from enemy attacks as much as possible. Also, casting another Concentration spell, like ![]() Cloud of Daggers, will put an end to the spell, so be sure to plan your character’s moves around only one Concentration Spell.
Cloud of Daggers, will put an end to the spell, so be sure to plan your character’s moves around only one Concentration Spell.
You can choose one more Cantrip here. You can choose anything you want from the remaining options, as we already picked the best stuff. The Bard doesn’t get access to many useful Cantrips.
College of Swords Bard Mid-Game Levelling Guide
We will now go through levels 5-8.
Level 5 – Improved Inspiration and Spell – PS5/PC
At Level 5, the BG3 College of Swords Build becomes considerably more powerful.
First of all, your standard Proficiency bonus is increased to 3 rather than 2, making you even better at the skills you’re proficient in.
You also gain the ![]() Font of Inspiration passive feature, which lets you replenish your Bardic Inspiration Charges with a Short Rest. The bonuses from Bardic Inspiration are also increased.
Font of Inspiration passive feature, which lets you replenish your Bardic Inspiration Charges with a Short Rest. The bonuses from Bardic Inspiration are also increased.
We also get to pick a third-level spell. We highly recommend choosing ![]() Glyph of Warding. This is a very powerful spell that lets you place a 8-metre wide magical trap on the ground. With each cast, you can choose from the following types of Glyph:
Glyph of Warding. This is a very powerful spell that lets you place a 8-metre wide magical trap on the ground. With each cast, you can choose from the following types of Glyph:
- Sleep – Puts everyone in range to sleep for 2 turns when triggered.
- Detonation – Emit a gust of wind that pushes back all within.
- Thunder – Deals 5-40 Thunder Damage to everyone in range.
- Lightning – Deals 5-40 Lightning Damage to everyone in range.
- Fire – Deals 5-40 Fire Damage to everyone in range.
- Cold – Deals 5-40 Cold Damage to everyone in range.
- Acid – Deals 5-40 Acid Damage to everyone in range.
These effects have a Dexterity Saving Throw. The Glyph types that deal damage will still deal half of their damage to targets who succeed at the Saving Throw. You can place the Glyph underneath an enemy, detonating it immediately. If you get a high damage roll then you can decimate entire groups of enemies very quickly with this spell. Just be very careful that you don’t catch yourself or your allies in the AOE, because you could potentially one-shot them, even from full health.

Level 6
At Level 6, you’ll gain an additional Third Level Spell Slot, giving you three of these in total.
In addition, you’ll gain the following abilities:
 Countercharm – You and any allies within 9 metres have
  Advantage on Saving Throws against being
  Charmed or Frightened.
- New Spell – We recommend learning
 Hypnotic Pattern.
 - Extra Attack – You can now make two attacks per Action instead of one, effectively doubling the potential value you get out of each Action. This is very powerful and will be a considerable boost to your build.
Level 7
At Level 7, you’ll gain a Fourth Level Spell Slot, and you can choose one more spell to prepare. We recommend choosing a Fourth Level Spell so you can immediately make use of your more powerful magical options.
A really useful spell to get here is ![]() Dimension Door, which lets you teleport yourself and one adjacent ally to a location that you can see. This is great for getting out of trouble or getting into a high ground position.
Dimension Door, which lets you teleport yourself and one adjacent ally to a location that you can see. This is great for getting out of trouble or getting into a high ground position.
Level 8
At Level 8, we get to pick another Feat for our College of Swords Bard Build in BG3. Get Ability Improvement and improve your Charisma to 20.
Increasing our Charisma Modifier here will also unlock another spot for a Prepared Spell. We recommend choosing ![]() Confusion, a Concentration Spell which will confuse a group of enemies, causing them to attack creatures at random (including each other), run around aimlessly, or skip their turn entirely. This effect can last for up to 3 turns. This has a Wisdom save, so you’ll get the best results when casting it on enemies with low Wisdom. Be sure to Examine enemies to see their stats before deciding if it is worth casting this or not!
Confusion, a Concentration Spell which will confuse a group of enemies, causing them to attack creatures at random (including each other), run around aimlessly, or skip their turn entirely. This effect can last for up to 3 turns. This has a Wisdom save, so you’ll get the best results when casting it on enemies with low Wisdom. Be sure to Examine enemies to see their stats before deciding if it is worth casting this or not!
You’ll also gain another Fourth Level Spell Slot here, giving you two in total.
Swords Bard Late-Game Levelling Guide
We will now go through the last few levels, 9-12.
Level 9
At Level 9, you gain one more Fourth Level Spell Slot, giving you a total of three.
You also gain your first Fifth Level Spell Slot, and are able to prepare one more spell for use.
We recommend getting the ![]() Hold Monster Spell, a Concentration Spell that allows you to Paralyse a creature, preventing them from moving or reacting, and guaranteeing Critical Hits against them when you attack from within a three-metre distance. This spell has a Wisdom save, so you may have a low chance of success against enemies with high Wisdom. If in doubt, right-click an enemy to examine its stats.
Hold Monster Spell, a Concentration Spell that allows you to Paralyse a creature, preventing them from moving or reacting, and guaranteeing Critical Hits against them when you attack from within a three-metre distance. This spell has a Wisdom save, so you may have a low chance of success against enemies with high Wisdom. If in doubt, right-click an enemy to examine its stats.
Level 10
At Level 10, your BG3 College of Swords Bard Build will gain a few new features and buffs:
- Another Fifth Level Spell Slot, giving you two in total.
 Improved Bardic Inspiration – Bardic Inspiration now gives a bonus of 1-8 instead of 1-6.
- Gain Expertise in another two Skills you are Proficient with, doubling the Proficiency Bonus for those Skills.
- You get to use
 Magical Secrets, allowing you to choose another two Spells from outside the Bard Spell List. We recommend going for:
 Banishment – Banish the target to another plane of existence for 2 turns. Requires Concentration.
 Cone of Cold – Make a flurry of frost, crisp air, and condensed snow crystals erupt from your hands. Deals 8-64 damage up to a distance of 9 metres. On save: Targets still take half damage.
These two extra Spells give the Bard some new options for controlling dangerous enemies or dealing high amounts of damage themselves.
Additionally, you can select another Spell; we recommend picking ![]() Mass Cure Wounds.
Mass Cure Wounds.
You can also select another Cantrip. We already got the most important ones, so pick whatever you like the most.
Level 11
At Level 11, you gain access to Sixth Level Spells. You’ll only ever get one Spell Slot for this level of magic, so the spells can only be cast once per Long Rest.
You’ll be able to unlock one additional Spell – we recommend choosing ![]() Eyebite, a Concentration Spell that lets you inflict dread, sickness or put the target to sleep. As long as you keep concentrating, you can cast the spell again on each subsequent turns.
Eyebite, a Concentration Spell that lets you inflict dread, sickness or put the target to sleep. As long as you keep concentrating, you can cast the spell again on each subsequent turns.
Alternatively, you can get ![]() Otto’s Irresistible Dance. This is a weaker spell than Eyebite, but it’s probably a more funny and thematic option for a Bard to have, as it literally compels the target to begin dancing uncontrollably.
Otto’s Irresistible Dance. This is a weaker spell than Eyebite, but it’s probably a more funny and thematic option for a Bard to have, as it literally compels the target to begin dancing uncontrollably.
Level 12
If you’ve reached this point, then you have successfully levelled your College of Swords Bard build up to the maximum level. Congratulations!
First, we can select a new Spell; we recommend ![]() Otto’s Irresistible Dance, which causes enemies to start dancing uncontrollably.
Otto’s Irresistible Dance, which causes enemies to start dancing uncontrollably.
Additionally, we get to select another Feat. We recommend getting War Caster, which gives you ![]() Advantage on Concentration Saving Throws, making it considerably more likely that your Bard will retain Concentration when they take damage. We’re using quite a lot of Concentration spells on this build, making this Feat a good fit. As a bonus, you can cast
Advantage on Concentration Saving Throws, making it considerably more likely that your Bard will retain Concentration when they take damage. We’re using quite a lot of Concentration spells on this build, making this Feat a good fit. As a bonus, you can cast ![]() Shocking Grasp as a
Shocking Grasp as a ![]() Reaction against enemies who move past your character.
Reaction against enemies who move past your character.

Equipment for the College of Swords Build in BG3 – PS5/PC
Now, let us take a look at what equipment your College of Swords Bard Build can use. You will find an early game and an endgame setup below.
Early Game Gear
This early game gear setup for our Bard Build with College of Swords subclass can be acquired in Act 1 and early Act 2. You don’t need to follow this to the letter, but it is recommended to read through it so you understand what each piece of gear can do. Some items are bard-specific and can really improve your build and gameplay.
Plenty of the early game equipment triggers off our Bardic Inspiration, granting you extra bonuses when you inspire your allies.
| Slot | Icon | Item | Effects | Location |
|---|---|---|---|---|
| Head |  |
Cap of Curing |
|
Inside the Druid Grove in a Gilded Chest next to Alfira |
| Cloak |  |
Cloak of Protection |
|
Purchased from Quartermaster Talli in Last Light Inn |
| Chest |  |
Blazer of Benevolence |
|
Complete the Rescue Volo quest |
| Gloves |  |
Wondrous Gloves |
|
Mimics encounter inside the Grymforge in the Underdark |
| Boots |  |
Boots of Aid and Comfort |
|
Purchase from Grat the Trader inside the Goblin Camp |
| Necklace |  |
Amulet of the Harpers |
|
Buy from Quartermaster Talli at the Last Light Inn |
| Ring 1 |  |
Ring of Protection |
|
Steal the Sacred Idol in Druid Grove (quest) |
| Ring 2 |  |
Whispering Promise |
|
Buy from Grat the Trader inside the Goblin Camp |
| Main Weapon | Sword of Screams |
|
Dropped by True Soul Nere in the Grymforge | |
| Second Weapon |  |
Shortbow +1 |
|
Buy from trader Roah Moonglow |
Since the Bard is already really good at healing and supporting allies in the early-game, we included gear that plays into this. You and your allies will gain extra HP and buffs when you heal them or use Bardic Inspiration on them.
We opted to use a Rapier for our weapon because it is a Finesse weapon, meaning it can be wielded using Dexterity instead of Strength. Even though we might be Proficient in some weapons with higher base damage potential, like the Longsword, we don’t want to use them because they can only be wielded with Strength, so your attacks will tend to be weaker and less accurate.
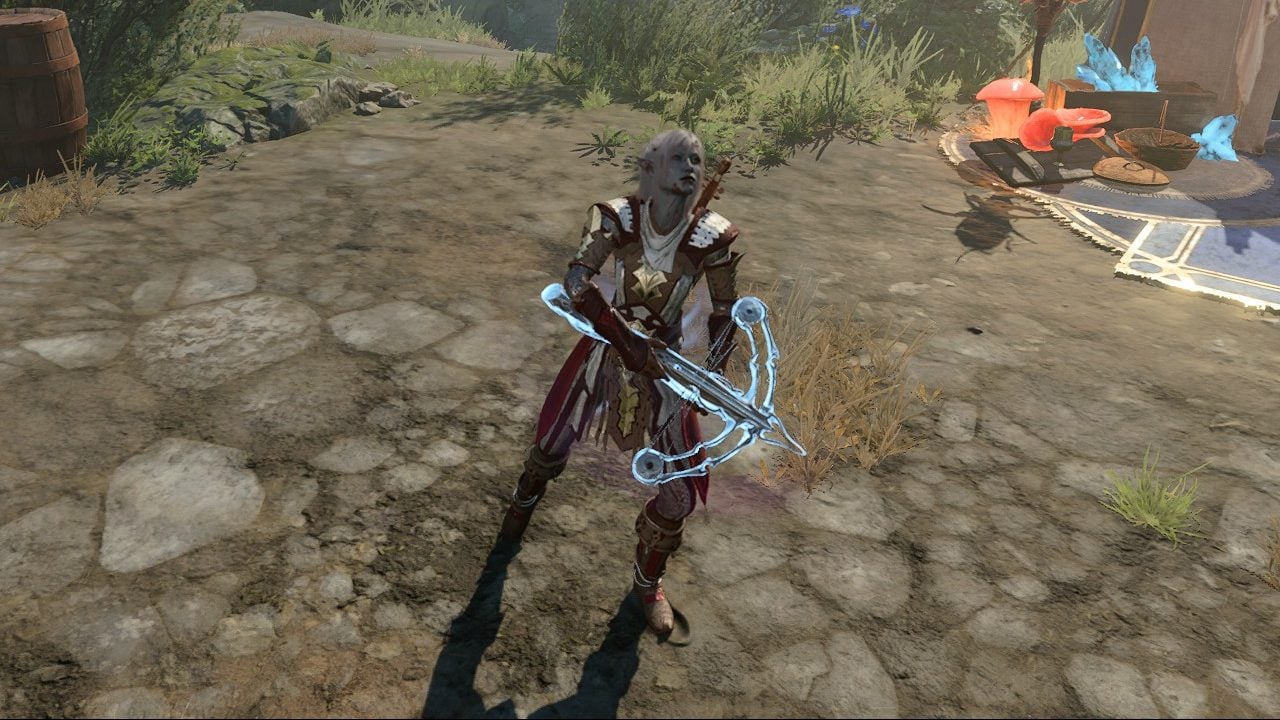
Finally, using a decent ranged weapon is important to deal damage on turns where you don’t do any spellcasting and don’t have any good melee options. This is because the Bard lacks any viable attacking Cantrips – Vicious Mockery is only a 1d4, which just isn’t good enough. You might have Proficiency with better types of ranged weapon than the Shortbow or Hand Crossbow, depending on your chosen race. For example, Wood Elves can use Longbows. If that applies to you, look out for more powerful ranged weapons to use than the one we recommended here.
Endgame Gear
The endgame gear setup is built together with items from late Act 2 and Act 3. While you don’t need all these items, try to get as many as possible to increase the overall power of the Swords Bard Build.
| Slot | Icon | Item | Effects | Location |
|---|---|---|---|---|
| Head |  |
Hood of the Weave |
|
Can be bought from Mystic Carrion inside his Philograve’s Mansion |
| Cloak |  |
Cloak of the Weave |
|
Sold by Helsik at the Devil’s Fee once you unlock her “special stock”. |
| Chest |  |
Potent Robe |
|
Complete Rescue the Tieflings, then get the reward from Alfira at Last Light Inn. If Alfira is dead, you won’t get this reward! |
| Gloves |  |
Helldusk Gloves |
|
Defeat Haarlep and loot the gloves from him |
| Boots |  |
Helldusk Boots |
|
Lord Enver Gortash’s personal chest |
| Necklace |  |
Amulet of Greater Health |
|
Inside the Archive in the House of Hope |
| Ring 1 |  |
Ring of Regeneration |
|
Buy from either Rolan or Lorroakan’s Projection at Sorcerous Sundries. |
| Ring 2 |  |
Whispering Promise |
|
Buy from Grat the Trader inside the Goblin Camp |
| Main Weapon |  |
Duellist’s Prerogative |
|
Complete the Save Vanra quest in the Lower City |
| Second Weapon |  |
The Dead Shot |
|
Sold by Fity the Firecracker trader in the Lower City |
We’ve kept the Whispering Promise from our early-game setup, but pretty much everything else has been updated.
Our items are mainly focused on improving your Spell Save DC, making your spells more likely to overcome their target’s defences. We are using a very high amount of debuff spells with Saving Throws, such as Hold Monster and Eyebite – maximising your Spell Save DC will make these Saving Throws as difficult as possible for enemies to survive.
We’ve also thrown in the Amulet of Greater Health and Ring of Regeneration for extra survivability, and the Duellist’s Prerogative is a great backup option if you need to use your Bard in melee. With your Dexterity score of 16, your Bard will be decent (if not spectacular) at using this weapon in melee.
Swords Bard Extra Info
Here is some additional information that will help you get the most out of this Baldur’s Gate 3 College of Swords Bard Build.
Swords Bard Build Tips and Tricks for Baldur’s Gate 3
It’s useful to keep in mind that Combat Inspiration is a Bonus Action, so you don’t need to worry about using up your turn to buff allies this way – you can Inspire them and cast another regular ability in the same turn.
In the early game, you will feel a little bit limited with how much you can use Bardic/Combat Inspiration. Once you hit Level 5, this ability will start feeling much stronger and more readily available, as you’ll be able to replenish it with Short Rests.
Remember to make use of the Toggleable Passive Feature or Reactions on the recipient of Combat Inspiration, to consume the buff and gain a benefit from it. To recap, Valiant Roll is activated via a Toggleable Passive Feature, whereas Valiant Attack, Defence and Damage are all triggered via a Reaction.
The Bard’s spells do not make use of Attack Rolls, which is both a good and bad thing. It’s good because your spells will not miss – your opponents’ chances of avoiding or mitigating your spell damage will depend only on their Saving Throws, where applicable. However, the drawback is that your spells cannot Crit, because Critical Hits happen as a result of the Attack Roll system. Note that this system is separate from Damage Rolls. A dice roll still occurs to decide how much damage the spells do.
College of Swords Bard Build Illithid Powers (optional)

Illithid Powers are unlocked later in BG3 when you learn more about Mind Flayers and Tadpoles. By eating Jars of Mind Flayer Parasites you gain one point. This is another optional skill tree that you can get access to if you want. Here are some of the best Illithid Powers for the BG3 Bard Build with the College of Swords subclass:
 Concentrated Blast: Allows you to deal extra damage to a target when you are Concentrating on a spell, potentially also healing if the target is Concentrating too.
 Cull the Weak: When you reduce a creature’s hit points below a certain threshold, this power instantly kills it and deals Psychic Damage to nearby enemies. This is particularly effective when engaging groups of weaker foes, enabling you to thin their numbers rapidly.
 Fly: This can be used to reach hard to get to places or change positions in combat.
 Black Hole: This power creates an area-based effect that pulls in and slows targets. It’s particularly useful for crowd control, allowing you to cluster enemies together for area-of-effect attacks or to isolate them from vulnerable allies.
 Psionic Backlash: This is a top-tier reaction from the Illithid Powers skill tree in BG3. This allows you to deal psychic damage when a nearby enemy casts a spell. This is especially useful if the target is casting a Concentration Spell. The damage from Psionic Backlash can immediately break their Concentration, ending the spell’s effects.
Best Party Composition for the College of Swords Bard
The College of Swords Bard works great when paired with high-damage melee classes, since your buffs will typically have the greatest benefit when cast on them. While the Bard can be used as a healer, I think it is best to have a Cleric in the party, who will also serve as the primary healer. The Bard’s spell slots are best spent on Concentration Spells, particularly buffs and attacking spells.
A setup like this will work nicely:
-
- This Swords Bard Build
- 1 Strong Melee Frontliner
- 1 Versatile Damage Dealer
- 1 Support/Healing Cleric
Other Baldur’s Gate 3 Builds
- Druid Build – Circle of the Moon
- Ranger Build – Hunter
- Monk Build – Way of Shadow
- Monk Build – Way of the Four Elements
- Monk Build – Way of the Open Hand
- Necromancer Build – Necromancy
- Fighter Build – Battle Master
- Barbarian Build – Berserker
- Warlock Build – Great Old One
- Cleric Build – Light Domain
- Rogue Build – Thief
- Sorcerer Build – Wild Magic
- Wizard Build – Evocation School
- Paladin – Oath of Ancients
- More Baldur’s Gate Guides & Builds
If you want to check out the map of Baldur’s Gate 3, please visit the Baldur’s Gate 3 Interactive Map.
The post Best BG3 Sword Bard Build Guide – College of Swords appeared first on AlcastHQ.


